


Riding a skateboard that always calls for your dominant foot forward could be tiring and might be unhealthy for your muscles. That said, you should also train your less-powerful foot to push or control the skateboard from the front end. By then, you’ll feel more confident using your board with either foot forward.
Let’s make this aspect more exciting by teaching you how to 180 on a skateboard. This skill will help you use your feet alternately to keep them from feeling overworked. Here are its essential phases.
- Kicking the tail
- Rotation
- Landing
Table of Contents
What You Will Need
The more complicated a skateboard trick gets, the better your tools should be. Here are the things you need to make a perfect 180 ollie.
A heavy-duty skateboard
It’s not every day that you can get any board rolling, especially when you do a 180 on a skateboard. You will be jumping, kicking, moving your skateboard front and back, and adding some pressure on it when you do this trick. That said, we need to ensure your skateboard is a perfect fit for it.
- A short board – For doing tricks, it’s best to have a shortboard. Skateboards of this type have a width of around 8″ and commonly a length of 32″. These deck dimensions make the board suitable for any rider level and age.
- 97a wheels – The best wheel hardness level that can give you a quality experience when doing tricks is at 97a. Rollers of this class have an extra pop, helping you perform any skill with ease and comfort.
- Aluminum alloy trucks – To ensure a long-lasting pair of these components, always look for those made with aluminum alloy. This material offers optimum durability, enough to contain impact and changing motions on the skateboard.
A skateboard park
Unlike other skateboard skills that you can do on the road or in any open space, doing a 180 will require you to find a skating park.
The stages of performing a 180 skateboard trick will call for a flat surface or a ramp, which are all present in a skateboarding arena.
Protective equipment
You are at risk of meeting accidents and injuries when doing a skateboard 180 turn. From obtaining momentum down to the landing, anything can happen. And while we always hope for a harmless execution of the trick, it’s always better to prepare a medium of protection.
- A helmet – Since you are about to do the trick in a skate park, there are chances your head will bump into something. So, using a head guard will always be a good solution.
- A set of knee and elbow supports – Your knees and elbows’ joints suffer more impact when you defend the rest of your body from a skateboarding mishap. So, to minimize any adverse effects of these circumstances, you have to protect these parts.
- A pair of ankle support – You will be doing a series of movements and adjustments when doing a 180 trick. That said, we need to ensure that your ankles can cope with these motions and keep you balanced on the board.
Steps for Skateboard Cruising
Knowing how to do a frontside 180 is close enough to learn a casual ollie. But what makes it even more fun is you will have to make a series of adjustments up on air, like a stuntman. Let’s live to that excitement with these steps below.
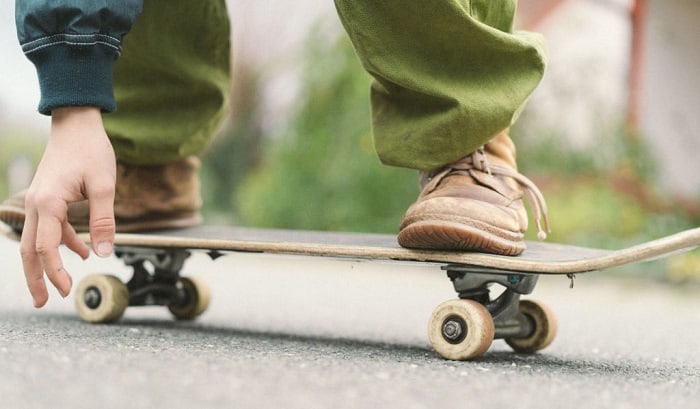
Step 1: Foot positioning
Being in the proper position for a 180 front-side skateboard trick guarantees an efficient execution. So, let’s work with your feet first. Like an ollie, you need to face the length of your board and pick a front foot to place in between the middle of the deck and the inner front truck bolts.
Follow with your back foot by placing it on the tail of the board. Take note that both of your feet should be slightly perpendicular to the length of the skateboard. Also, your shoes’ tip should align with the edges of the deck.
Step 2: Body stance
Unlike an ollie, doing a 180 needs mechanical work on your upper body to achieve some torque.
Begin by leaning in front with both of your shoulders level. This step is a preparatory procedure to help you complete the 180° turn.
Also, don’t forget to bend your knees, a fundamental tip to keep you balanced on the board. The goal here is to make you feel comfortable with your posture before doing the 180.
Step 3: Ollies in place
Before you move to the ollie with a half-circle turn, try to practice a stationary ollie first. So, from the appropriate position discussed in the previous steps, kick the tail of your skateboard.
Raise your front foot and glide it to the nose.
Next, level the board out on air by raising your back foot. Lastly, land smoothly by bending your knees.
Step 4: Front foot movement
This step will make you appreciate the trick more. Still, in your ollie preparatory position, push or kick on the tail of the skateboard. But this time, you will have to wind up your body, followed by the foot movement on the board.
So, as soon as you pop your skateboard up, glide your front foot up to the nose. When gliding the side of your shoe up, you also have to guide the skateboard’s nose to the back. It’s light to move the board up in the air, which means you need not exert too much force.
Step 5: Back foot support
It’s time we make your back foot support the trick. Once your front foot reaches the tip of the skateboard and moves it backward, raise your back foot. Make sure it matches the height of your front foot and the board leveling up. Wait until the back of the deck makes contact with your back foot up on air. Then, slightly push it forward.
That way, you get to assist your initial front foot in rotating the skateboard and completing the 180° turn.
Step 6: Shoulder movements
This step should be simultaneous with the two previous procedures. Let’s say you’re using the left as your front foot. If you’re doing a frontside, that means your right foot has to come front by the end of the trick.
Your shoulders, during the execution, should pivot opposing the rotating direction of the board. This step will help you put better force into turning the skateboard.
Step 7: Landing
As a rule, bending your knees from any trick helps you gain balance, which applies to 180 ollies. So, after completing the 180° turn on the air, land as smoothly and stable as possible.
And to achieve it, do not ever counter the impact from the ground. Keep your knees bent until you obtain your core again. By then, your front foot is now at the tail of the board.
Step 8: 180 ollies in motion
It’s best to have enough speed of learning how to fs 180. You need not be too fast, but enough to keep you rolling after landing. So, in a wide-opened space in a skatepark, push your skateboard to obtain some momentum.
After reaching adequate speed, position yourself according to the previous steps. Then perform the 180 and land the safest way. You may also want to do it in A-frames or any ramp, but be sure you master doing it on flat surfaces first.
Conclusion
With a new skill added to your skating bucket list, you get to be more confident riding the skateboard. And with dedication and compliance with safety and proper techniques, you will surely learn more.
Now that you know how to 180 on a skateboard, it’s time to put things into action. Remember the tips I have shared with you, and don’t forget to look after your comfort.
Experience more thrill with your skateboard. Did you enjoy this article? Please drop your thoughts in the comments section.

Hi, I am Charles Harris. I opened this site to write as much as I can about my biggest passion – skateboarding!
I started as a clumsy yet passionate rookie 10 years ago to now a still passionate yet much better skateboarder! But I have to tell you, the whole journey has always been fun and rewarding, indeed not without hardship.