

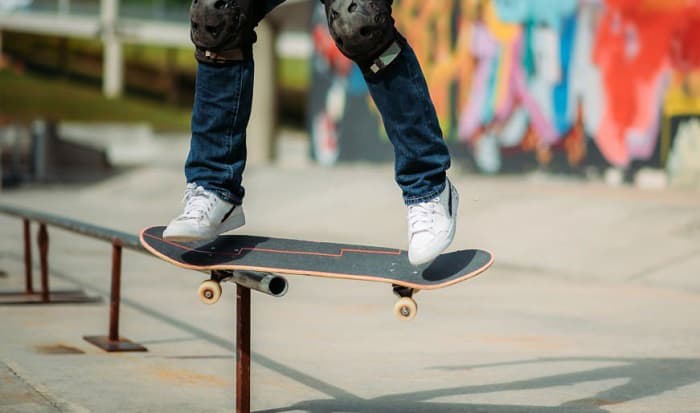
If you are a casual skater who doesn’t perform tricks often, scratches on the bottom side of your deck will alarm you. But if you engage with skate parks and rails, these marks are more expected than not.
Nonetheless, these flaws don’t affect your ride. They are mere pieces of evidence of your upskilling as a skateboarder. And what causes these marks? Slides. Let’s learn how to boardslide on a skateboard as we add a new skill to the books.
Table of Contents
What You Need for This Tutorial
1. A flat bar and parking block
Most skateboarders doing a boardslide get a parking block for practice and a flat bar to do the move in the long run.
Standard parking blocks have a height of 4″ and a width of 6″. But these numbers are only the standard, which means others can go higher in size.
This narrow platform could be a perfect practice medium for a slappy boardslide because of its solid concrete build and stability for beginners.
On the other hand, flat bars are the ones used by seasoned skaters. They have different sizes, of which the most common is 6 feet in length, 4 feet in width, and a height of 10″ to 13″.
Many of these skateboarding apparatuses are now available online, and you can buy yours too.
2. Skateboard for tricks
I don’t recommend doing a boardslide on a longboard because cruisers and other boards of these kinds are less likely to withstand the trick.
To find the ideal slide rails skateboard, pick a deck size of 7.75″ to 8.25″. Also, look for a board built with durable materials like bamboo and maple wood. These will help contain the impact received by the skateboard from doing the trick.
For the wheels, get those with at least a 99a hardness level. These rollers have a high rebound capacity and can give you enough momentum in preparation for the boardslide.
Steps to Boardslide on a Skateboard
Now that we have all the tools we need, it’s time we practice the following steps.
Step 1: Footing
Your foot positioning will define how well you grind on a skateboard. Now let’s identify your front foot first. Ideally, it should be your dominant foot. So, if you skate with your right foot more often on the front trucks, that will be your front.
In this step, we’ll perform two positions; one during the approach and the other during the actual slide. And for better illustration, let’s use the right foot as your front foot.
To start with the boardslide approach, place your right foot’s tip on the front truck and parallel to the length of the deck. Then, slightly angle your heel to the right, leaving your foot positioned diagonally over the front truck.
Next, place your left or back foot over the rear truck the same way as the front. You’ll also have to angle it to the right until it goes parallel with your front foot.
Your footing during the actual slide is simple. You only have to position your feet over the trucks, perpendicular to the deck’s length and with the arches facing each other.
Step 2: Practice
Before we boardslide a rail on a skateboard, you should first learn how to balance. And in this case, we’ll use the parking block you have.
So, start by putting your skateboard over the parking block. The two objects should be perpendicular, and the concrete block should point to the middle part of the skateboard.
Next, put your feet on the skateboard one at a time. It should be as if you’re in the actual boardslide position. The goal is to lift all the wheels from the ground. So, try to balance yourself left and right until you stabilize on the skateboard resting on the parking block.
Once you’ve mastered balancing, you can do the actual boardslide.
Step 3: Approaching
Momentum is vital in this step. It’ll help you prepare and get on the flat bar with enough speed.
Begin by fixing the flat bar on stable ground and parallel to the path you plan to take. From a few meters away, push the skateboard toward the flat bar with your front foot on the deck.
Note that the deck’s nose should not directly point to the bar’s tip, so you won’t have a hard time looping the front truck over and to the other side of the bar. But before sliding on those bars, we first need to know that a boardslide has variations.
Step 3.1: Boardslide types
Boardslides come in two forms: the backside boardslide and the frontside backslide. Let’s learn them one by one.
The backside requires us to push towards a rail on our heel side.
On the other hand, the frontside backslide is when we approach a rail on our toe side.
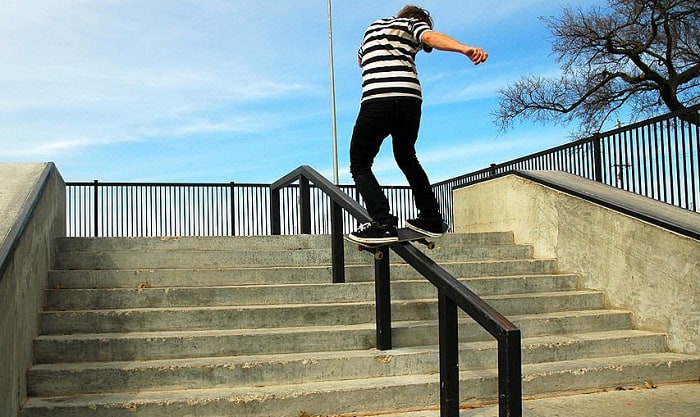
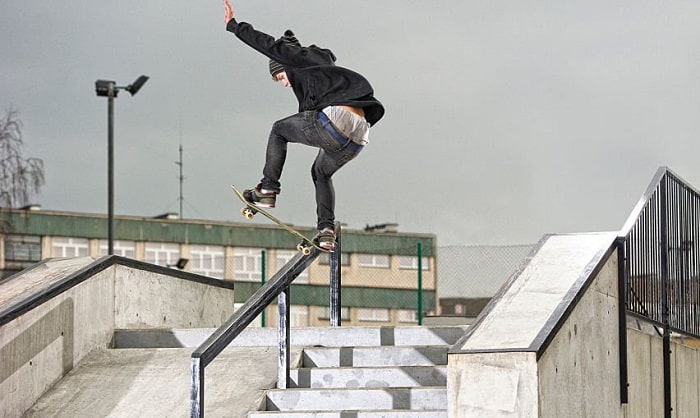
Step 4: Skateboard sliding
As soon as you get enough momentum, perform the foot position we described for the approach. With the nose of the deck nearing the flat bar, do an ollie by popping the tail.
If you’re doing the backside, loop the front truck 90° over the bar until it reaches the right side. Next, do the second footing we practiced for the actual slide.
And most importantly, ensure the deck drops on the rail in the same position as we did during practice with a parking block.
If you’re doing the frontside backslide, do the ollie and lift the front truck to the left side of the flat bar.
The momentum you gained during the approach will keep the deck sliding on the rail.
Step 5: Landing
Before finishing the rail, ensure you have enough balance by bending your knees and shifting your weight if necessary.
Push the deck’s tip to the front once the board detaches from the flat bar. Finally, do the initial footing while the skateboard is in motion.
Lipslide Vs Boardslide
Some skaters confuse a lipslide and a boardslide. But how do these two differ?
Lipslides let you loop the rear of the skateboard over and to the other side of the rail. However, in a skateboard boardslide, the front wheel is moved first to the other side of the rail.
Conclusion
Ramps and streets can be overrated avenues for skating. Sometimes, we also need to explore other ways to enjoy skateboards. And that is where rails, ledges, and curbs enter the scene.
Now that we know how to boardslide on a skateboard, doing ollies and 180s can get more thrilling. But before combining tricks, ensure your safety first and master the fundamentals.
Other tricks made for you:

Hi, I am Charles Harris. I opened this site to write as much as I can about my biggest passion – skateboarding!
I started as a clumsy yet passionate rookie 10 years ago to now a still passionate yet much better skateboarder! But I have to tell you, the whole journey has always been fun and rewarding, indeed not without hardship.