

Riding your skateboard to the park or skating arena is never a bad idea. But using it for miles is a different story as it may damage your board, especially if you don’t have a cruiser or another design suited for long rides.
Don’t worry if you find this situation relatable. Let me teach you how to carry a skateboard on a bike. This tutorial will not only help you bring your skateboard to ramps and bowls, but it’ll also help preserve it. Here are a few methods to consider.
- Wearing the skateboard
- Putting it on the bike’s frame
- Attaching a skateboard bike rack
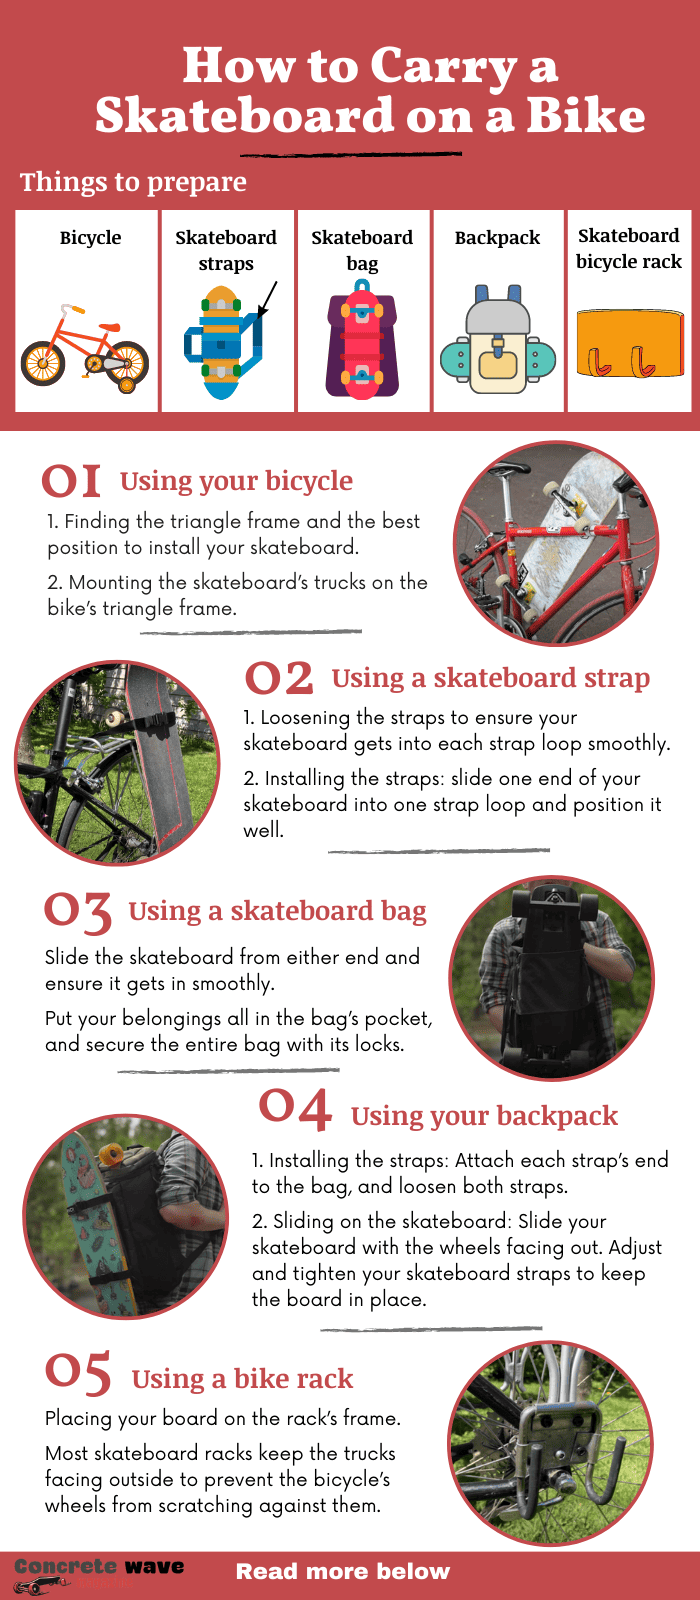
Table of Contents
What You Will Need
Attaching your skateboard with handlebars is a bad idea, which is why you should check out the methods we describe below. But before that, here are a few things you need to prepare.
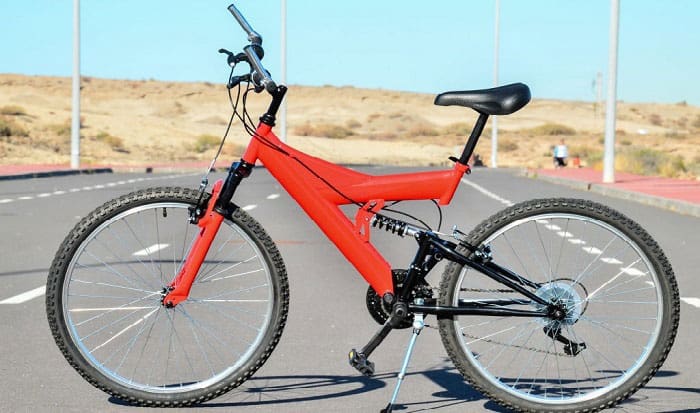
1. Your bicycle
We’re not going to be specific about your bicycle, since we’ll focus more on other aspects concerning bringing your skateboard. But here are a few things you need to have on your bike.
First, it needs areas for installing your racks. Second, it has to be fit for your build. That way, it won’t be difficult for you to maintain balance, especially with your skateboard on the bike or your body. The third and probably a bonus aspect is a space on the frame, enough to fit and lock your skateboard through its trucks.
2. Skateboard straps
A skateboard strap is like a sling installed on your board. It comes with a durable cloth or nylon body with both ends looped around each side of the deck. This skateboard belt measures from less than 2″ to broader or more secure versions.
Of the various pieces of equipment you can use when handling skateboards, straps are the easiest way to go. They also allow quick installation and removal from your deck.
3. Skateboard bag
Compared to the previous tool, skateboard bags are a more inclusive type. This equipment aims to hold your skateboard from all its sides and corners. They’re like your usual backpacks, only that they fit your skateboard alone and nothing else.
The good thing about skateboard bags is that they serve as another layer of protection for your board against dirt and liquid exposure. Also, some brands manufacture bags with pockets big enough to fit a T-tool or a few spare parts. These will be helpful should you encounter issues with your skateboard and no shop is nearby.
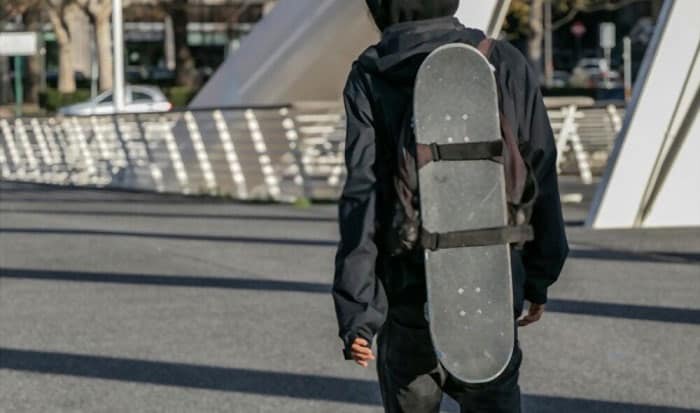
4. Backpack
We understand that you may need to bring a couple of clothes or any item not related to your skateboards, which is why you might consider taking a backpack with you.
This method is quite similar to the previous example, only that the bag we’re going to use is not one made solely for skateboards. With a backpack, we’ll have to incorporate some straps to secure your skateboard from behind.
5. Skateboard bicycle rack
Another way to bring your board along with your bicycle is by using a skate rack for the bike. This accessory comes in different forms based on the type of skateboard. So, before getting one, make sure you know the best type to use.
You also have to consider the rack’s size and durability. Since skateboards have different builds and weights, it’s best to check the rack’s specifications and boundaries in figures. That way, you’ll be sure you’re using the most appropriate and reliable frame for your skateboard.
How to Bring a Skateboard on a Bike
1. Using your bicycle
Step 1: Finding the frame
The first thing you need to do with your bicycle is found that triangle frame. You’ll see that triangle right below your seat. Two sides of this frame extend toward the pedals. Once you see the frame, start to think of the best position to install your skateboard.
Step 2: Mounting the skateboard’s trucks
Slide one truck of your skateboard into the top of the bike’s triangle frame. In the same way, hang the other truck on the bottom part of the frame. Once the board’s secure, you can ride your bike with the skateboard in between your legs.
A pro tip: Not every bicycle fits this style. So, if you find it inconvenient or dangerous, try other methods.
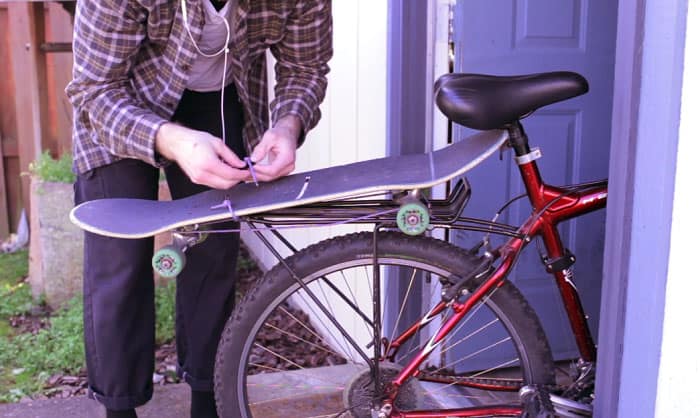
2. Using a skateboard strap
Step 1: Loosening the straps
To ensure your skateboard gets into each strap loop smoothly, try to loosen them first. That way, the straps won’t hang on to your trucks. Plus, you will also be able to position each loop appropriately.
Besides the loops, you also have to loosen the sling portion of the strap. It’ll help you gauge the perfect height of the skateboard on your body. It’s like adjusting a guitar to help you play more conveniently.
Step 2: Installing the straps
Let’s start with one end of your skateboard, either the nose or the tail. Slide one end of your skateboard into one strap loop and position it well. Note that the best spot to place the loops is the space in between the two trucks. And to ensure you get a perfect balance, the gap between each strap loop and truck should be the same on both ends.
Next, adjust the height of the sling part. Make sure it’s not too long or too tight. It will prevent the skateboard from distracting you when biking.
3. Using a skateboard bag
Like placing all your belongings orderly inside your bag, putting your skateboard in its carry bag should go the same way. What’s better this time is that your skateboard bag comes with a shape accustomed to your board, so it’ll be easier to fit the board inside.
All you have to do is clean the insides of the carry bag. Next, slide the skateboard from either end and ensure it gets in smoothly. Lastly, take the skateboard tools and hardware you think you’ll need in a state of emergency. Put them all in the bag’s pocket, and secure the entire bag with its locks.
4. Using your backpack
Step 1: Installing the straps
Most sporting backpacks come with designs fit for additional accessories, like straps. In this step, all you have to do is grab a pair of straps with locks or velcro tapes. Attach each strap’s end to the bag, and loosen both straps to give way to your skateboard.
Step 2: Sliding on the skateboard
After installing the straps, it’s time to lock your skateboard to your backpack. With the straps loosened, slide your skateboard with the wheels facing out. That means the stepping surface goes against the face of your bag. Adjust your skateboard straps and tighten them to keep the board in place.
5. Using a bike rack
A skateboard holder for a bike comes in various forms. Once you get the rack size appropriate for your skateboard, the next thing to do is to install it on your bicycle.
Next, place your board on the rack’s frame; the frame should hold the skateboard ends firmly. Most skateboard racks keep the trucks facing outside to prevent the bicycle’s wheels from scratching against them.
A pro tip: Since there are different skateboard rack styles available today, you might as well check what the brand suggests in terms of installation. This way, you’ll know if the rack’s right for your skateboard.
Conclusion
Before biking with your skateboard on your body, all you have to do is secure your bicycle, your skateboard, and yourself.
Now that you know how to carry a skateboard on a bike, there’s no way you can’t take your favorite boards with you on your bicycle.
Did you enjoy this tutorial? Tell us what you think in the comments section.

Hi, I am Charles Harris. I opened this site to write as much as I can about my biggest passion – skateboarding!
I started as a clumsy yet passionate rookie 10 years ago to now a still passionate yet much better skateboarder! But I have to tell you, the whole journey has always been fun and rewarding, indeed not without hardship.