


Want to know a way to show off your board other than riding it? What’s better to do with your board than to put it on display? Skateboards on the wall will surely tell people a lot about you. Or if you’re just looking for ways to store and secure your board, then you are in the right place.
In this article, we will discuss how to hang a skateboard with wheels on the wall. It’s high time you knew other ways you can give purpose to your board. Hanging your skateboards is also one of the best ways of preserving them, especially if you have boards you don’t use anymore but still keep for the sentiment.
Table of Contents
What You’ll Need
Here are various ways for you to hang a skateboard on the wall. You can choose between wall mounts and anchors, a DIY rope hanger, or hooks.
- Wall Mounts and Anchors
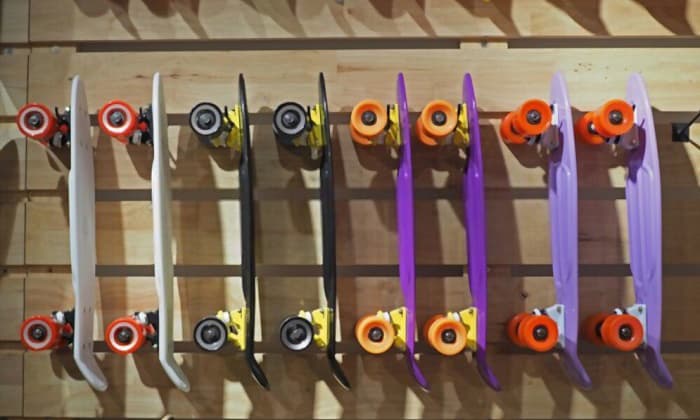
Starting strong, and this might be the first thing you thought about, is the use of wall mounts. A wall mount uses a screw, not a nail, to mount a skateboard on the wall. This is a great way to display or store your skateboard horizontally without the need to remove the wheels.
Mounts also use anchors to keep everything in place. They might come quite costly, but they are the sturdiest and last the longest.
- DIY Rope Hanger
If you can’t find those skateboard mounts, then you can resort to using ropes. This is a great way to hang skateboards on wall vertically, and again, without removing the wheels, because you can easily find the materials we will be using at your local dollar store or hardware shop.
- Hooks
You can also use store-bought hooks to hang your skateboards! They may not be as sturdy as our first two options, but they still get the job done and are cheaper.
And just like the second option, this is another great way to display your board vertically without removing the wheels. This also might be the simplest of them all and gives your display a floating effect when done correctly.
Listed below are the necessary things you’ll need for this project. You may opt to choose a single option or all of them, depending on your preference.
1. For Wall Mounts and Anchors
- Wall Mounts – You can find wall mounts specifically for skateboards. These usually come with anchors already.
- Screws – if there are no screws included, just look for a size that is appropriate for your wall mounts.
- Electric Drill – we will use this to attach the mounts onto the wall.
- Pencil – this is optional, but it is always better to have a marking material at hand.
2. For DIY Rope Hanger
- Rope – Make sure that the variant you choose is compatible with your board and is strong enough to last and hold it up. We suggest buying one with a 6 mm diameter.
- Sharp Knife – or any other item that can cut precisely and cleanly. This is vital to our process.
- Electric Drill – This is what we’ll use to attach the rope onto the wall where we will hang our skateboard.
- Screws – We recommend using a 3mm × 30mm size.
- Pencil – or any other material for making markings.
- Ruler – We’ll use this for making accurate markings.
- Screwdriver – We’ll use this to attach the crews on the holes we made using the drill.
- Lighter – This may be optional. We’ll tell you when to use it later.
- Masking Tape – this is also optional. This will help you get a better visualization during the measuring process.
3. For Hooks
- Wall Hook – The wall hook you will choose should be strong enough to hold your skateboard up. We also recommend you choose one with a short hook if you want to give it the floating effect, but you can also use a long one for a tilted style.
- Rope or a Fishline – Choose a rope that is thin but woven and strong. You can also opt to use a fishline since it is clear and does not get noticed easily.
- Scissors – We’ll just simply use this for cutting.
Step by Step Guide
Here are the instructions that will guide you through each of the methods listed above.
1. Wall Mounts and Anchors
- Step 1: Select where you will hang your board(s). Place your mounts and make sure they are properly aligned. Make your markings and get ready to drill in the next step.
- Step 2: Get your drill and start making holes for the screws. After this, you can now attach the mount itself.
- Step 3: Test if it is sturdy. Once done, you can now place your board.
2. DIY Rope Hanger
- Step 1: First, determine where you will place your rope hanger. Make sure the space can accommodate the board(s) you will hang.
- Step 2: Using a ruler and a pencil, make two parallel vertical lines on the wall. Make sure they are 14 or 15 inches apart. You can also use masking tape for better visualization. After this, make two horizontal lines from the first line to the second. The intersecting points are where you will drill the holes.
- Step 3: Before you drill, step away a little and make sure everything is aligned so we can avoid mistakes and redos. Once you are satisfied with your markings, then you can start drilling. Drill holes that are accurate to the size of the screws you will use.
- Step 4: Attach the screws into the holes. Make sure to leave some space for you to tie the ropes. Make sure to remove the masking tape first if you use one.
- Step 5: Measure the rope as to the length you desire. Add a little extra for when you tie it on the screws. If you are using a nylon rope, this is where the lighter comes in. To prevent fraying of the ends, melt them using the lighter. This will make them last longer.
- Step 6: Tie your ropes to the screws. Make sure they are very tight and secure. You can opt to screw them deeper, it is up to your preference.
- Step 7: You can now hang your skateboards! You can also repeat these steps for all the skateboards you will hang.
3. Hooks
- Step 1: Just like for the other two methods, choose where you will place your skateboard.
- Step 2: Determine your desired hook placing. Make sure that the board will cover it in order to achieve the floating effect. A good tip is to place it just a little below the board’s edge. Once you do, peel off the sticker protection film and attach the hook onto the wall. Make sure it is firmly placed.
- Step 3: Using your rope or fishline and scissors, cut a length long enough to hang the board with. Remember that the line will go below the wheels through the holes on the board. Make sure it is the right length if you still want to have the floating effect.
- To avoid redos, cut the line a little longer because it’s easier to shorten a rope than to lengthen it.
- Step 4: Now that we are done with the hook and the rope/fishline, try hanging your board on it by the wheels. Make your adjustments as you go until you achieve the placement you desire.
Note: Not all store-bought hooks are the sticker type; some need to be drilled with screws. Obviously, the latter are sturdier, but they also need more work and measurement, just like our first two options.
Conclusion
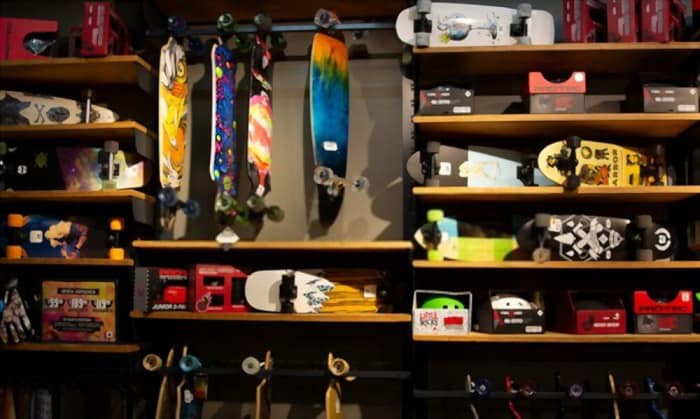
A skateboard hanging on wall is a great way to showcase your hobby through interior design or simply to store your board. This method saves space and allows you to have an artistic display.
We hope you now know how to hang a skateboard with wheels on the wall. The methods and tips in this article can also be used if you want to hang a longboard on the wall. You can just tweak them a little to adhere to your board’s specifications.
Read next:
- Detailed guide on hanging skateboard on the wall without nails.
- List of top skateboard racks to display your skateboard neatly and aesthetically.

Hi, I am Charles Harris. I opened this site to write as much as I can about my biggest passion – skateboarding!
I started as a clumsy yet passionate rookie 10 years ago to now a still passionate yet much better skateboarder! But I have to tell you, the whole journey has always been fun and rewarding, indeed not without hardship.