

Anything we use is subject to wearing and damage. And like skateboard wheels, the time will come when we’ll have to replace them to maintain quality rides. That means our search for the best wheels continues as long as we ride our skateboards.
To support your venture over different wheel brands, you need to know first how to change skateboard wheels. This skill will help you shift from one wheelset to another without professional help. Here’s a summary of the steps you’ll encounter along the process.
- Removing the wheels
- Cleaning the trucks
- Attaching the new skate wheels
Table of Contents
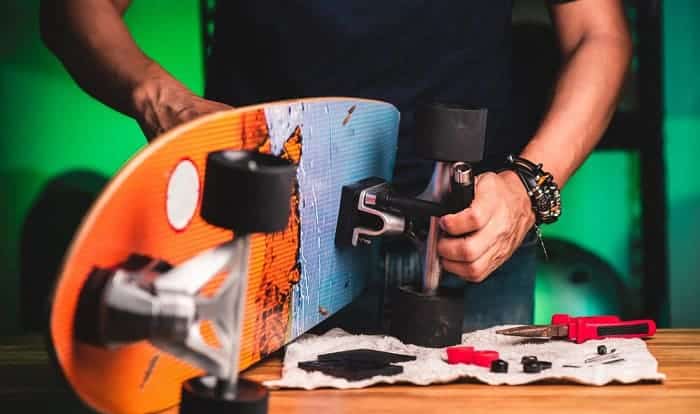
What You Will Need
Skateboard wheels are solely dependent on your choice. And no matter what you pick, always prepare the things you will need below.
Your skateboard
You will have to make some assessments if you have more than one skateboard whose wheels need replacement.
Your first consideration should be based on which board you use more frequently. The second is which among them has the most damaged set of wheels. That way, you’ll be able to prioritize what wheels to buy for your boards, especially if you have a budget limit.
A pro tip: conduct regular check-ups with your skateboard and estimate the timeline for repairs and maintenance. This tip will help you prepare enough for any cost you might incur maintaining your boards. Also, you’ll see which one is still fit for your usage.
A clean working space
Just like repairing electronic devices, replacing skateboard wheels entails dealing with small parts. So, you have to make sure these components remain complete until you finish changing your rollers.
You can get yourself a table or any spacious working area to make room for all your tools and skateboard. Also, be sure you’re working on a flat and stable space to keep the parts from rolling everywhere.
A pro tip: you can place a light-colored cloth on top of your working space. Washers, bearings, nuts, and other wheel parts will be easy to locate and identify by then.
A T-tool or a wrench
A T-tool is a standard piece of equipment you need to remove and replace skateboard wheels. It comes with three sizes of sockets, a Phillips screwdriver, and an Allen head. These are all compressed in a T-shaped tool, which means you won’t have a hard time finding them after changing skateboard wheels.
You can use a wrench if you find using a T-tool costly or don’t have one yet. This tool comes in different sizes, and there are also adjustable versions.
No matter what you choose, be sure you’re most comfortable with it and that you get to replace your wheels correctly and with ease.
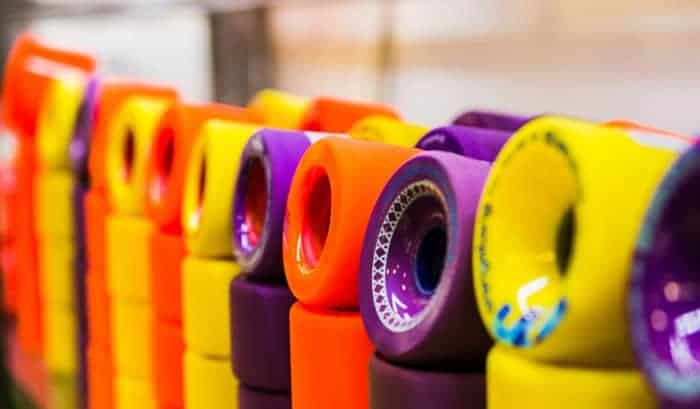
Your new set of wheels
Suppose you have already bought your new set of wheels or prepared those you want to transfer. Put those rollers on your working station and be sure they’re complete with bearings and other components. Note that some wheel brands do not come with wheel cores, so you need to buy them separately when buying the wheels.
Also, ensure that the wheels you prepared are fit for your deck. These considerations should include the size, hardness, wheel shape, and other physical factors that affect your ride. That way, you get to maximize your investment in your new wheelset.
Other skateboard users remove one wheel off their skateboard before buying and take it to the store for reference.
7 Easy Steps to Change Skateboard Wheels

It’s easy to imagine how to put wheels on a skateboard by looking at the things you prepared. But to ensure you’re doing it the proper way, consider the following steps below.
Step 1: Preparation
First, try to visualize how the wheel-changing process will take place. That way, you’ll have an idea of dealing with all the details of your board’s wheels. Next, arrange your tools and other skateboard components based on the sequence of the entire process. This step will help you logically organize your pieces of equipment.
A pro tip: you can also write a checklist of what you need to ensure you’re not missing anything.
Step 2: Removing old skateboard wheels
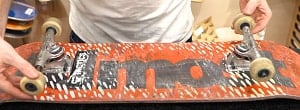
Place your skateboard on your working area with the stepping surface facing horizontally. Whether you’re pulling the left or right wheels first, it won’t matter. Using your T-tool or adjustable wrench, loosen the nuts on the rollers. Next is to pull the wheel and nut and secure them in an accessible location. Repeat the same process with the rest of the wheels. Be sure you group the removed parts according to their kind.
Step 3: Wheel referencing
You may plan to use your old wheel as a basis before buying a new set. With that, you can revise the process by removing one roller first and detach the rest after buying your replacement wheelset. Bring the sample wheel to the store and let the personnel assist you in finding the ones you need.
Also, you may ask them to attach the bearings to your new wheels so the process will be more convenient for you.
Step 4: Cleaning
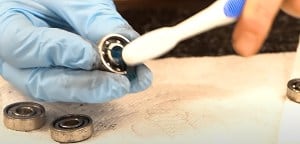
One of the best ways to preserve your skateboard and its parts is by keeping them clean. You need not wash them or apply chemical solutions as these can only degrade the quality of your board’s components.
Begin by cleaning the trucks. Knowing how to dismantle and assemble a skateboard truck is a plus but not a necessity. However, knowing this skill will help you slow down rust build-up on the pins, nuts, and other parts as you clean them. You can use a damp cloth to wipe off the dirt from your rides and dust from stockings.
Step 5: Installing the replacement skateboard wheels

Suppose the wheels are now complete with the bearings; now you can install them to the trucks. With the skateboard in the same position, place one roller on the truck’s spoke. Then put the nut after the wheel. Use the T-tool or hand wrench to tighten the nuts. Repeat the process with the rest of your wheels.
Step 6: Test riding
Your wheels’ stability will be a factor in your rides. After installing all four wheels on your skateboard, try riding it to address any issues. If the wheels feel wobbly, you better tighten the nuts. Note that it’s normal to see the wheels move back and forth slightly. You need not apply too much pressure on the rollers to the extent that they no longer move as you will not achieve the results you want. You have to be somewhere in between a too loose and too tight wheel installation.
Step 7: Wrapping up
One of the reasons why a T-tool is way better than individual hand wrenches and sockets is for your convenience in fixing them once done replacing the wheels. These may also be bulky on your end if you plan to bring the tools. Nonetheless, no matter what you use, be sure to gather them all at the end of the changing process.
Also, don’t forget to clean your area and organize the parts you might need in the future.
More Pro Tips
- Maintain optimum lubrication on some of your skateboard’s components that need it. It will help prevent friction among parts, giving your board a smooth performance.
- Keep an eye on every piece of equipment and skateboard component, especially the ones you detach. You might be throwing away a set of washers you thought you no longer needed.
- Seek help from experts if you feel unsure about the skateboard wheels you want to install.
Conclusion
The truth is anyone can replace skateboard wheels without a professional guide. But only a few can do it correctly.
Knowing how to change skateboard wheels with appropriate fundamentals is the only way to ensure quality wheel upgrades and skateboard performance at the same time. Thus, keep the tips I have shared with you and replace those rollers like a pro.
Did you enjoy this tutorial? Drop your thoughts in the comments section.

I am Michael, and I have been enjoying this fun sport for seven years. And nothing is better than having a community to share our passion for those thrilling tricks. I am ready to tell you all I know about skateboarding, showing you how to choose a good board and trick to start and how the practice goes. Stay tuned!