

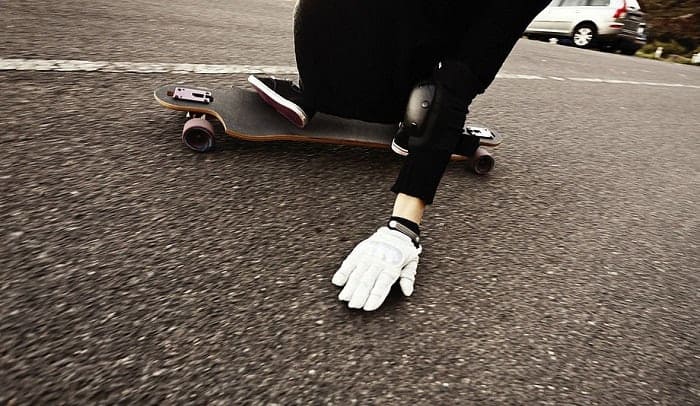
Sliding gloves are a crucial safety tool for every longboard rider. These gloves have various benefits, such as preventing your shoes into holes caused by a footbrake or protecting you from sliding/falling during the ride.
Even though this apparel’s price can be lower than your wear-out shoe replacement, the safety gloves are still in the range between $50 and $90, which is quite expensive for an amateur.
Hence, if you want to create your own gear at home with a more comfortable price (~$56), let me show you how to make slide gloves for longboarding with easy-finding items at a dollar store within only six steps:
- Select your velcro layout
- Glue and sew the velcro
- Design the puck
- Slide and smooth the pucks
- Stick pucks to the gloves
- Dry and finish the gloves
What You Will Need

Before getting started, let’s decide which style of sliding gloves you prefer: a casual pair or a special one for an extra-long ride. It also depends on how far you want to take your ride and your budget so as to choose the sliding material based on its cost and availability.
Here, I will guide you to make longboarding gloves with affordable materials and easy-to-find items in your nearby dollar store, and then you can create your homemade slide gloves with another sliding matrix.
1. Two pairs of gloves
One can be your old gloves to avoid your hands getting sticky, but the other should be new for DIY slide gloves. I suggest selecting a pair of UHMWPE gloves (Ultra High Molecular Weight Polyethylene), which cost only ~$12.5. This material is considered to have the toughest components for longboarding at that price with its coefficient of friction as well as closely-bonded chemical structure.
2. A saw
If possible, a hacksaw is a preferable option for you to cut out items during work time. This type is just about $12, which is much cheaper than others (for example, a jigsaw is triple the price). However, the hacksaw blade is quite brittle, easily fractured, and you need to be careful when using it. Please note that you must be sure that you are familiar with this saw type to have a better small cut; otherwise, any other available saws are acceptable.
3. Duct tape and cloth glues
You are free to choose the tape color as it will not be visible on your new gloves. However, make sure that your purchased duct tape should be long-lasting, sticky, and resistant to weathering, which are all utterly essential for longboard riders.
Besides, it is necessary to prepare enough glue for the whole process (~$8). There are various types of glue you can find in a dollar store, but it will be ideal for you to buy the spray adhesive ones, and seriously avoid the ordinary white glue.
4. Optional items
You can also consider preparing a chopping board (~$5), a clamp (~$13), a normal pencil, and a clearly-marked ruler (~$5). Like cloth glues, you have the option to choose among a wide array of cutting boards. From my experience, you’d better use a plastic one with a width of 0.3 inches for a firm grip. However, it will be alright if you already have a wooden or bamboo cutting board.
You rely on clamps, a pressure applied to hold and secure items, preventing any movement or separation. On the other hand, you still can make longboarding gloves without clamps; just make sure you tighten objects in every step and complete them all within a day.
In summary, the total price for all the above items is ~$55.5, but it might still be expensive for you to purchase them all at once. Hence, my advice is to try to borrow some of the tools like a saw, working gloves, a cutting board, or clamps.
Steps to Make Slide Gloves for Longboarding
DIY slide gloves are not only for personalizing your style but also aim for safety reasons. Therefore, let me remind you to carefully follow the following procedure step by step to make high-quality and fashionable gloves for a good ride.
Step 1. Select your Velcro layout
First, you should choose suitable hook and loop strips since some of them can not be manually sewed. To be specific, it will be better if you purchase soft hook and loop tapes, which support more stitching and flexible materials.
Be careful with Velcro strips that may lead to many problems, such as blocking the sewing needle and shattering the fabric (back adhesive tape) or making the sewing process difficult and discomforting (stiff tape). The suggested way is to cut your designed Velcro (ideally six pieces) before attaching them to your homemade slide gloves.
Step 2. Glue and sew the Velcro
The second procedure is to pin available Velcro strips by glue and then, tightly sew them to your DIY slide gloves. In this step, a denim sewing needle is the most suitable option for your sliding materials to prevent breaking and bending issues during work time.
In my experience, the Velcro layout needs various overlaps in a finishing position, and it requires a properly-aligned fabric. Moreover, be careful with the threading process of your sewing machine. It is extremely vital to thoroughly test the tension settings by using a heavier thread, a snippet, and the designed Velcro.
Step 3. Design the pucks
When it comes to pucks, there are many cool shapes that you can find on the Internet. After choosing your favorite shapes for your sliding material, I suggest creating square and circle patches with a finger dimension of 5cm x 14cm along with a palm size of 10cm x 11 cm.
It is better to stretch all the puck dimensions on the chopping board before cutting them. There is one tip for you: a board without a handle makes your cutting process much simpler. Besides, you can prepare an anaerobic epoxy for the palm puck to connect with the adhesive Velcro rapidly.
Step 4. Slide and smooth the pucks
If it is the first time you use a hacksaw, please remember to point out the margin of a patio to start cutting the patch without any damage. Now, it is time for the chopping board and clamps to fasten the UHMWPE marked sheet with the previous dimensions firmly. Remember to smooth the sharp pucks’ edges by gently rubbing on the pavement until you get your favorite shape. For example, an octagon before a circle is the simplest way.
Step 5. Stick pucks to gloves
In my experience, you’d better directly glue to the duct tape instead of your homemade longboarding gloves, then gradually apply it to your pucks. Moreover, you should wear the old prepared gloves while spreading the adhesive glues to avoid getting residue on your hands.
It will be great if you can put the pucks exactly to your glued duct tape. If not, gently and quickly remove them and repeat the process to as accurately as it is utterly essential for safety reasons. Do not forget to stick even coats to complete your favorite pucks.
Step 6. Dry and finish gloves
Finally, the pucks may require time to stick to your sliding gloves as this material is pretty stubborn to glue. Make sure that you are holding them properly until they are well attached and non-removable. Then, dry the gloves in a clean and cool place. Since these gloves are in intensively contacted with the ground during your sliding rides, this step is very important for safety reasons.
Conclusion
Are you following until the final step of this procedure on how to make slide gloves for longboarding? Did you make your longboarding gloves? If yes, share your experience with us in the comments below. Moreover, you can also refer to other accessories such as socks, bags, backpacks, etc.
Personalizing your sliding gloves is economical and fashionable, and your incoming rides will definitely reach a new level. However, please make sure that you strictly follow the procedure for your safety.

I am Michael, and I have been enjoying this fun sport for seven years. And nothing is better than having a community to share our passion for those thrilling tricks. I am ready to tell you all I know about skateboarding, showing you how to choose a good board and trick to start and how the practice goes. Stay tuned!