

Designing skateboards isn’t a new thing anymore. Many skateboard owners opt for such a move to customize and give their boards a more distinct identity. Can you also do the same with fingerboards? Yes!
If you think you can’t design fingerboards or paper tech decks, let me tell you that there is one component you can customize easily—the trucks. So, today, let me teach you how to paint fingerboard trucks.
In this tutorial, we will use some common tools to design these components. Additionally, we’ll learn how to make custom fingerboards look aesthetic yet presentable.
Table of Contents
What You Need
It’s yet another day to be artistic and creative, but on a custom tech deck this time. Here are a few things to prepare.
- Nail polish – If you’re a guy, you probably never imagined going to the nail polish section of a store. For this project, you can use this tool to color your fingerboard. Color choices are almost endless. So, pick the best one that matches your style.
- Fingerboard tool – We’ll have to detach the trucks to paint them. Hence, we need a finger skateboard tool to loosen the truck bolts and reinstall these wheel holders later.
- Container
- Cardboard paper
Steps to Painting Fingerboard Trucks
To paint a fingerboard truck could be a simple and untiring job. But it requires a neat application. So, here’s how to achieve it.
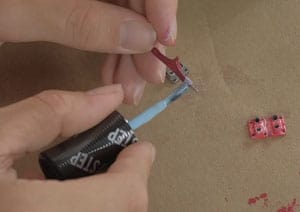
Step 1: Dismantling the trucks
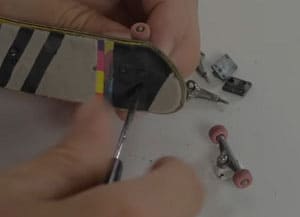
As mentioned, we should detach the fingerboard trucks to paint them on all sides and corners.
Thus, take your fingerboard tool. Loosen your front truck bolts, followed by the rear. Remember, these parts are significantly smaller than their skateboard counterparts. So, it’s better to have a container to keep them in.
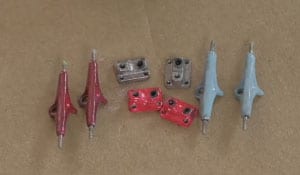
Next, loosen the axle pin nuts on the four wheels. Remove the rollers and secure them in the container. Ultimately, detach the hanger off the baseplate.
At this point, you should have two base plates and truck hangers to paint.
Step 2: Painting the trucks
Put your truck pieces on a piece of clean paper. This way, it will be easier to keep your table clean.
Take your preferred nail polish. Apply a few strokes on the paper to ensure the liquid color sits flat and smooth.
Hole one truck axle with your fingers. Begin painting the hanger and body. Next, position your baseplate on the paper and apply nail polish smoothly. Use your hand or another object to keep it from moving.
Repeat the same procedures with the rest of your fingerboard trucks. Our goal is to cover all the surfaces of these components. So, take as much time as you need.
Step 3: Apply the second coating
Is a second coating necessary? Most fingerboard users apply another layer to protect the initial coating or add some accent to the newly painted trucks. In this case, let’s try a nail polish lacquer.
So, let your truck components dry first from the first coating. Then, take your lacquer polish and apply it on the trucks however you want. You can paint it solid or light.
To finish, you can paint more details to distinguish your trucks better.
Step 4: Reassembly
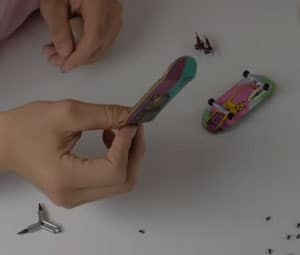
Let your trucks dry from all the paint, design, and accents you placed on them. Gather your truck bolts, wheels, and other hardware to prepare them for reassembly.
First, attach your truck hanger to your baseplate. Slide the truck bolts on the stepping surface through the deck. Align the wheel holder’s holes with the hardware and tighten each one.
Repeat the same process with the other truck.
Next, slide one wheel on the truck axle and lock it using the axle nut. Like a skateboard, ensure the roller still spins smoothly. Finish installing the rest of the wheels.
Conclusion
Customizing skateboards always seems challenging until we go over each step and follow it. Eventually, we’ll realize we’ve already given our boards a new identity with our personal touch.
The same principle applies to fingerboards. These miniature skateboards could be small and handy, but designing and customizing them gives us fulfillment the same way as painting skateboards.
Now that you know how to paint fingerboard trucks, you have finally unlocked a new milestone with your board. Remember, it’s all about creativity and applying the colors neatly and smoothly.
Here are other tips you can learn to make a fingerboard and DIY the fingerboard bushings. Furthermore, if you are looking for fingerboard tricks, don’t forget to read now the following guides:

Hi, I am Charles Harris. I opened this site to write as much as I can about my biggest passion – skateboarding!
I started as a clumsy yet passionate rookie 10 years ago to now a still passionate yet much better skateboarder! But I have to tell you, the whole journey has always been fun and rewarding, indeed not without hardship.