

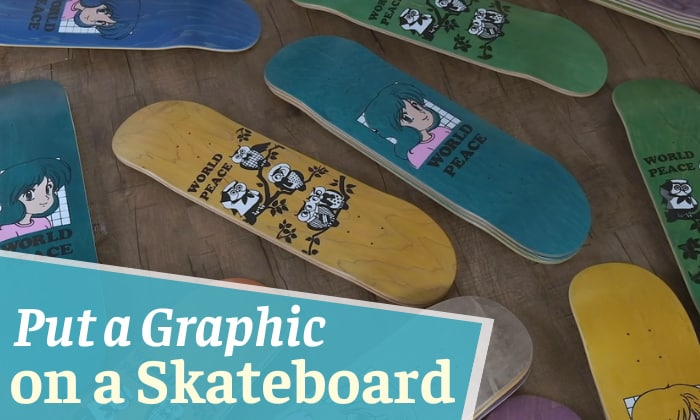
Perhaps, in idle times, we prefer staying at home and leaving our skateboards hanging on the side. But there might also be a period when we’d look at them and find their bottom sides too odd or plain. So, we think of ways to improve their style and design.
If you feel this way, let me teach you how to put a graphic on a skateboard. Here, we’ll discuss appropriate steps for applying these design ideas to our boards.
Not only that, but after learning this tutorial, we’ll be able to express our style better through skateboards.
Table of Contents
How to Put an Image on a Skateboard?
What you need
We need some materials to create our graphic skateboard decks, but don’t worry. If you like arts, you’ll enjoy this whole process. Let’s prepare the following.
- A skateboard deck – Let’s assume we have a skateboard detached from its trucks and wheels. Some people might want to lay easy skateboard designs over unprinted boards or those with existing prints, and which one you choose is up to you.
- Paints – We advise using spray paints. How many colors to prepare depends on your expected final look. But for the best results, ensure that you have a primer and a clear gloss to finish.
- Adhesive designs – Most skaters use paints as backgrounds for iconic images. So, to customize your skateboard better, it’d be best to prepare adhesive longboard graphics. If you don’t have time to draw, you can look for vinyl decals with your preferred characters or shapes.
- Stationery materials – We’ll be cutting through pieces of paper, adhesive, and tape throughout the process. Also, we’ll put marks on areas we cannot paint. So, it’s best to have cutters or scissors.
- Refining tools – Before applying paint on the skateboard, we might as well smoothen it with sanding paper. Additionally, we can prepare a paintbrush, toothbrush, and sponge to add color textures later.
- Face mask – Wear this so you don’t inhale the smell of the paint.
Steps to Install Skateboard Graphics
Now that we already have all the materials needed, it’s time to give the skateboards a whole new look.
Step 1: Prepare the deck
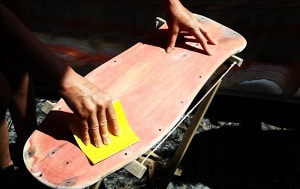
Rub the sanding paper against the deck’s bottom gently. This step will help fix the paint and other designs firmly on the board.
Next, put a strip of painter’s tape around the skateboard’s edges. Our goal for this move is to keep the paint from dripping to the sides of the board. So, apply this adhesive as meticulously and firmly as possible.
Step 2: Apply primer and base paints

Bring your primer spray paint out, and apply the color to the bottom of the deck. Most skateboard graphic and paint experts put three layers of primer on the skateboard.
When applying one layer after another, ensure that the preceding paint layer is already dry.
It’s more optional in this case, but you may also consider applying primer to the trucks if you want to paint these parts. If you do this, cover the threads with painter’s tape.
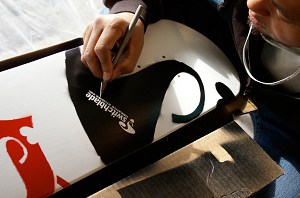
Step 3: Prepare the decals
Like the previous step, the application of decals depends on the owner’s preference.
Some stores offer ready-made stencil sticker decals for skateboards. But other skaters print their desired designs and lay them on adhesive vinyl.
Whether you create your own graphics or buy them somewhere, you’ll still yield excellent results. Trace the printed patterns and cut through them using a cutter or hobby knife.
- Friendly tip: We’re not rushing things here. Try to cut as smoothly as possible to preserve the corners of the graphics and be careful not to pierce your own skin.
Step 4: Apply a second coating
In this step, you may use various colors to paint abstract or patterned backgrounds on the bottom of the deck. Additionally, you can apply other color textures using the brushes and sponge.
Step 5: Place the decals
Do this step as if you’re trying to put a picture on a skateboard deck. Of course, there should be enough plotting and positioning to ascertain the decal’s perfect location.
So, when the decals’ adhesive layer has not been exposed, try to plot their location on the board. Again, this part of the tutorial depends on your preference.
Place the decals over the painted surface, and assess whether they look too big or too small. Once you’re sure of the locations, you can peel the non-adhesive sides off.
But make sure you peel that side gradually as you stick the skateboard graphic design on the deck. That way, you get to flatten the printed graphics neatly and firmly.
Step 6: Apply clear coating
After fixing all the printed designs on the deck, it’s time to finish them with clear gloss paint.
Yes, this paint may not be as visible as the colored ones, but it will help preserve the design on the deck. While this layer can still wear out, it’s better to have it than leave the decals bare.
Step 7: Finishing
Remember the painter’s tapes we placed on the board edges and trucks? It’s time to remove them. Also, if you want to refine the edges, you can grab the sanding paper and do so.
It may not happen the whole time, but you might damage the prints and paints while they dry. So, this stage is also a perfect opportunity to fix paint distortions or peeled-off parts of the decals.
Once everything is dry and fixed, you can re-attach the trucks and wheels.
Frequently Asked Questions
How do you heat transfer graphics to a skateboard?
DIY heat transfer skateboard graphics are attainable by anyone. Here’s how to do it.
- Lay the blank board in front of you.
- Align the background you want on the board.
- Slide the deck with the graphic on the heat transfer machine.
- Give the deck a couple of runs on the device until the colored layer is firmly in place.
- Remove the non-graphic layer and scrape off excess parts of the graphics.
How do you screen print on a skateboard?
Compared to heat transfer, screen printing skateboards takes a bit more work. Take note of these steps.
- Step 1: Place a printing screen on a bare skateboard deck.
- Step 2: Align the template design on the screen against your preferred printing location.
- Step 3: Apply white ink on the board to serve as a primer.
- Step 4: Repeat steps 1 and 2 for new screen design templates, and paint the second and succeeding colors you want.
What kind of graphics do primitive skateboards use?
Like printed customized T-shirts in history, primitive skateboards use screen-printed cartoon characters or other graphic designs for custom skateboard printing. Before a skateboard graphic printer existed, this method was common.
Conclusion
Maintaining skateboards is a useful skill, and so is designing them. What’s good about detailing a skateboard is it gives the user the freedom to express themselves.
Besides knowing how to put a graphic on a skateboard, you can still do more to improve it. So, be patient in mastering the steps. By then, you’ll be ready enough to remodel your board.
Stay creative, and always aim for the best results.

Hi, I am Charles Harris. I opened this site to write as much as I can about my biggest passion – skateboarding!
I started as a clumsy yet passionate rookie 10 years ago to now a still passionate yet much better skateboarder! But I have to tell you, the whole journey has always been fun and rewarding, indeed not without hardship.