

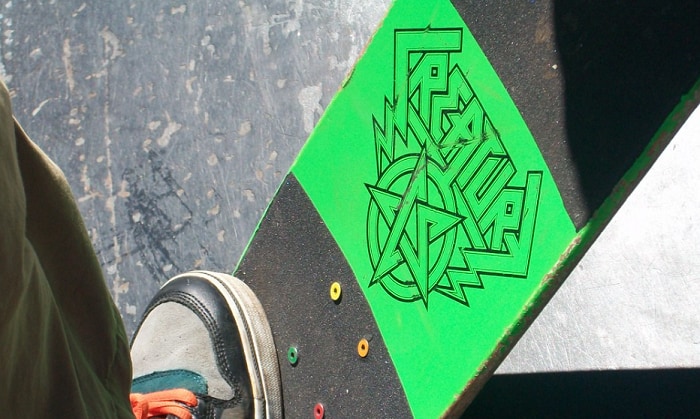
Skaters grow. And that’s not only in skateboarding skills but also in other aspects. Such areas include maintenance, repairs, or assembling a skateboard kit.
Talking about assembly, did you once think of the possibility of customizing your skateboard decks? If so, let me teach you how to shape a skateboard deck out of molded wood plies.
What’s good about learning this process is you can refine your decks as manufacturers do. In this tutorial, we’ll perform a few procedures on the deck before finally mounting all the skateboard’s parts.
Table of Contents
Prepare the following to Shape a Skateboard Deck
- Molded uncut deck – Some brands like Creature already have this piece in their skateboard deck DIY kits.
But if you don’t mind starting from scratch, you can also form your deck from multiple wood plies glued together and stored inside a Thin Air Press (TAP) bag. But that is going to be another process.
- Pencil – We will do some tracing and marking on the skateboard deck. And the best way to not leave unwanted marks on the deck is by using a pencil because it’s erasable.
- Jigsaw – Perhaps, the most crucial part of shaping a skateboard is the cutting process. And with that, a professional tool like the jigsaw is necessary.
- Orbital sander – Sanding means refining the cut board to achieve smooth edges. So, we need an orbital sander. For areas the hand tool cannot reach, sanding paper may suffice.
- Blades – Most skateboard deck kits now come with grip tapes. So, we might as well prepare razor blades for the tape installation.
Shaping the Skateboard Deck
Step 1: Preparing the molded blank deck
If you bought a ready-to-cut deck, there’s no need to go over this process. But if you learned how to make a skateboard mold and decided to press a skateboard deck on it, you’ll probably start with the deck inside a TAP bag.
So, remove the valve cap on the bag’s surface and open the bag’s seal. Next, pull the blank deck with its mold out. Remove the wood piece from the mold and set things aside, except the uncut skateboard deck.
Step 2: Preparing the skateboard outline
Another benefit of buying a DIY deck kit is the skateboard deck templates coming with the package. These are thin sheets of paper or other material cut to the shape of a skateboard deck.
Nonetheless, we can still create a skateboard template illustrator by printing. Just prepare printable paper, a laptop, and a printing device.
So, with the help of software, create an outline scaled to the size of a skateboard. You can also find drawings online easily.
Probably, the shape will not fit in one sheet, but that’s not a problem; you can print multiple. Once you finish the skateboard deck’s layout, it’s time to print.
After printing, cut the pieces of paper and assemble them to achieve the deck shape you planned.
Step 3: Tracing
It’s time to transfer the printed skateboard design template to the deck. Begin by finding the center of the deck’s width and drawing a line parallel to the skateboard’s length.
Perform the same step to the printed template. Align the lines by placing the sheet on top of the deck.
- Pro tip: It’s best to print the template on translucent paper for easier alignment.
Once you secure the template’s position on the deck, put tape on its corners to keep it from moving. Grab your pencil and trace the edges of the skate template to the blank deck.
Remove the printed sheet, and the board’s ready for cutting.
Step 4: Cutting

As mentioned, cutting through the blank deck is a crucial step. As most skaters do, start with the sides of the board. While there is no basis for why you cannot start from the nose or tail, there’s no harm in the beginning with the straight traces.
Cut the deck slowly and steadily. Take as much time as you want until you cut the perfect shape.
On a side note, working with a jigsaw is risky and challenging. So, it’s best to master this tool before using it on your deck.
Step 5: Sanding
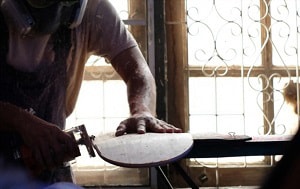
Put the jigsaw aside. Grab your orbital sander and begin to round and soften the edges of the newly-cut skateboard deck.
You can start from either the top or bottom side of the board. Run the sander slowly over the shape of the deck, giving it a steady sanding motion.
If you decide to cut a handle hole on the deck’s body, use sandpaper to smoothen the opening.
Step 6: Installing the grip tape
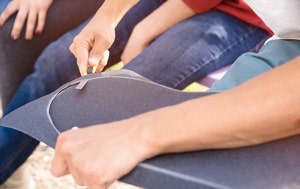
While grip tape installation is a different detailed process, let me summarize the steps here.
So, plot the uncut grip tape over the deck. Slowly uncover the adhesive side of the grip tape as you stick it over the deck’s body.
Flatten the grip tape from the sides to eliminate air bubbles. Perform the process gently until you fully cover the deck’s surface.
Fold the excess grip tape downwards. Get your blade, and cut these parts out slowly. Now, you have your grip tape installed.
Conclusion
Assembling a skateboard kit is a milestone for any skater, and so is creating a skateboard deck out of maple layers.
Knowing how to shape a skateboard deck is only one of the cores of customizing this gear. And now that you learned about this task, you can finally teach others to create skate templates, cut boards, and finish the edges smoothly.

Hi, I am Charles Harris. I opened this site to write as much as I can about my biggest passion – skateboarding!
I started as a clumsy yet passionate rookie 10 years ago to now a still passionate yet much better skateboarder! But I have to tell you, the whole journey has always been fun and rewarding, indeed not without hardship.