

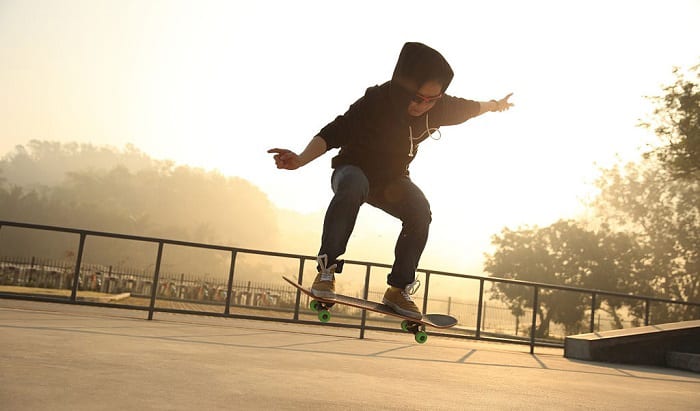
If you are a beginner, you might have probably gone checking over several tricks and ended up feeling overwhelmed. It’s because these tricks are challenging to perform, or they could be simple, but you don’t know where to get the basics.
Don’t worry. Since you are here, I will teach you how to shove it on a skateboard, a fundamental skill every skateboarder has gone through. Here are the core steps you need to master.
- Footwork practice
- Stationery shove it
- Practicing for mastery
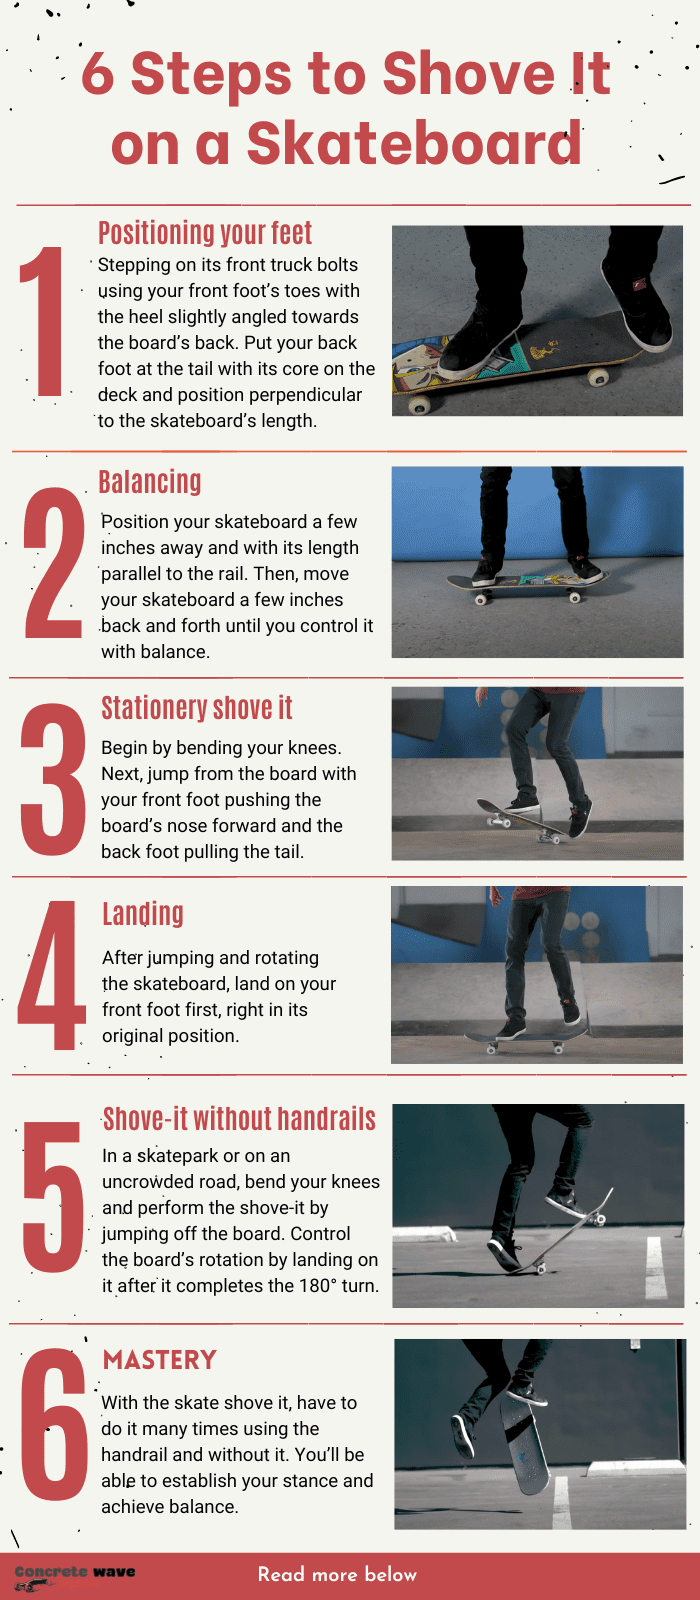
Table of Contents
What You Will Need
Practicing the shove it trick might not be the most challenging task you have as a skateboarder, but it still needs the right pieces of equipment to help you achieve the best outcome. Take note of the following.
1. A fixed handrail
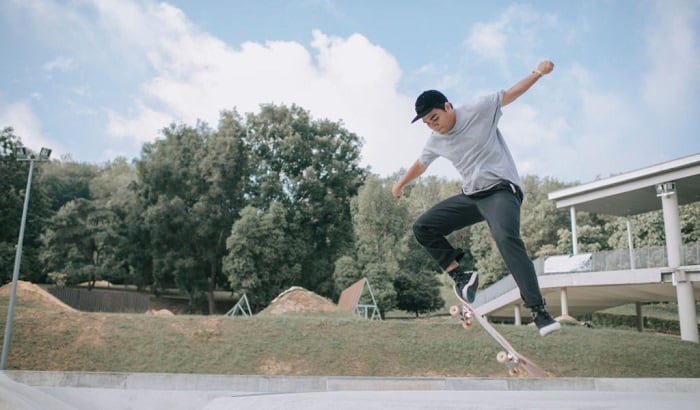
Skateboarding, in general, requires utmost stability, whether you’re doing tricks or cruising. While doing a shove-it, you need to practice balancing on your skateboard, which is why you need something to stabilize you, like a handrail. You can find these fixtures almost anywhere. Where there are garages or terraces, there can also be a handrail.
Of course, you should look for a rail that’s not too low or too high for your hands to reach. When using a handrail, make sure you remain in your original posture even when holding onto it. That way, you won’t feel awkward standing on your board after practicing with the handrail.
2. Skateboard for tricks
Like playing ball games or any sporting event, skateboard tricks require the most appropriate board. And on this occasion, you will need a board that meets the following specifications.
First is the deck size. A perfect skateboard for tricks has a deck width ranging from 7.75″ to 8.25″. With this size, you get to have ample stepping surface, especially when landing from the trick. Take note that your trucks’ width should also match that of the deck.
Next is your wheelset. On a durometer A scale, choose wheels at a 99a to 100a hardness level. These rollers should also have a high rebound. These wheel aspects give you some rolling speed, enough to build momentum before doing the skateboard shove it.
Last is the material composition. Your deck should be of durable materials, like maple wood or bamboo. Aluminum alloy would be perfect for your trucks. And for your wheels, they should be of good quality urethane. You will do endless jumping on your skateboard, so it needs to be durable and reliable all the time.
3. Safety gear
Whether you’re a newbie or an experienced rider trying to teach shuvit for beginners, safety should always be your priority. Since you will perform a trick, you need to expect to fall off your skateboard several times. And with this, you have to protect yourself from injuries by using a set of safety equipment.
Let’s start with the elbow and knee support. More often than not, you will use your knees or elbows when you slip or fall from your skateboard. So, these joints need protection from impact, which, if not applied, can later cause you to stop skateboarding for good.
By instinct, you don’t want to fall on your head. But if the circumstances do not favor you, take precautions like using a helmet. Your head is the most sensitive part of your body when doing any physical activity. So, you might as well keep it from harm.
Steps to Shove It on a Skateboard
Like any skateboarding skill, you need to have a standard set of procedures to guide you to do the right thing. So, take note of the following steps.
Step 1: Positioning your feet
Where you place your feet will dictate your overall performance of a shove-it trick. So, make sure you practice the correct footing for this skateboarding skill.
Start by facing the length of the board. Follow up by stepping on its front truck bolts using your front foot’s toes with the heel slightly angled towards the board’s back. Next, put your back foot at the tail with its core on the deck and position perpendicular to the skateboard’s length. Take note that you can put any foot forward.
Step 2: Balancing
With the help of the handrail you found, try to practice balancing on the board. Position your skateboard a few inches away and with its length parallel to the rail. You must be facing the handrail by then.
Grab the handlebar in front of you and perform the previous step as you perfect the proper foot positioning on the board. Then, try to move your skateboard a few inches back and forth until you control it with balance.
Step 3: Stationery shove it
Still, with the handrail, begin to practice the shove-it. Take note that this trick will only require you to move your feet in opposite directions.
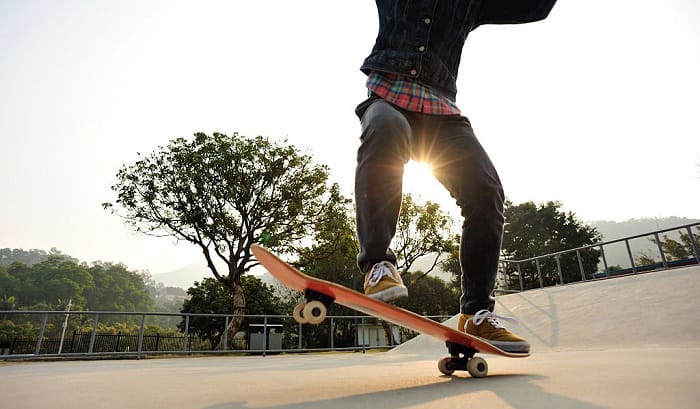
Hold the handrail well. Begin by bending your knees as you’re about to jump. Next, jump from the board with your front foot pushing the board’s nose forward and the back foot pulling the tail. The goal here is to make the skateboard turn 180°.
Once you get comfortable with balancing and the rail-assisted shove-it, start practicing without the handrail.
Step 4: Landing
This step is one of the most crucial in the shove-it process. It’s indicative of your balance once you complete the skateboard’s 180° turn. So, master it as you won’t have enough time to find your foot’s positioning after jumping.
After jumping and rotating the skateboard, remember to land on your front foot first, right in its original position. Landing on your back foot first that aims for the tail will only lead to an accident. Nonetheless, you can still move your back foot to its appropriate position if it lands in the wrong place.
Step 5: Shove-it without handrails
In a skatepark or an unbusy road, try riding your skateboard first, observing the proper foot positioning. Begin to obtain momentum. Make sure you’re moving into a spacious area. From there, start bending your knees and perform the shove-it by jumping off the board. Control the board’s rotation by landing on it after it completes the 180° turn.
Step 6: Mastery
Like any skateboarding trick, you need to practice each step to perfect the entire routine. And with the skate shove it, you will have to do it many times using the handrail and without it. That way, you’ll be able to establish your stance and achieve balance.
Also, by constantly practicing, you get to address any issue with your positioning, landing, and any other movement.
Pro tips
- Try to fix your jump at a uniform height. That way, you’ll be able to adjust your force when rotating the board and your timing when landing on it.
- Always keep an eye on your skateboard when performing shove-its to grab it immediately after completing the 180° turn.
- Regain your posture after landing on the board to keep yourself from falling off it.
Conclusion
With a thousand things you can learn about skateboarding, it’s always best to take them with eagerness. This attitude keeps you driven to achieve any skill in the most efficient way.
Learning how to shove it on a skateboard is only one of the exciting tricks you will encounter as a skateboarder. So, keep the tips I have shared with you as you explore more.
Shove it until you perfect it. Did you like this article? Don’t forget to leave your thoughts in the comments section.

I am Michael, and I have been enjoying this fun sport for seven years. And nothing is better than having a community to share our passion for those thrilling tricks. I am ready to tell you all I know about skateboarding, showing you how to choose a good board and trick to start and how the practice goes. Stay tuned!