

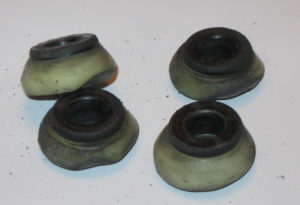
Bushings are responsible for the sharp turns and pivots you perform with your skateboards. These are the thick rubbery rings made with PU and seated on the kingpins of your trucks. Without these, we can’t expect smooth skateboard rides.
And like any skateboard part, bushings are also susceptible to damage and wear. It could be due to several factors, like overly tightened kingpins and excessive force.
One indicator of bushings needing changing is a significant decline in your skateboard’s performance. Of course, you don’t want to ride with worn-out bushings. So, let’s learn how to replace skateboard bushings to keep our turns sharp and smooth.
Table of Contents
What You Need
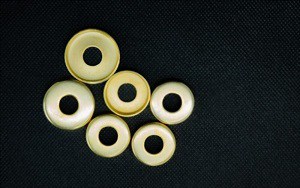
- Choice of bushings – If given a chance, try to search for bushings of the same brand as your trucks, so you’ll be more confident they’ll fit on the kingpins. Also, be mindful of the bushing’s hardness level to see what suits your skateboard best.
- A T-tool/wrench – Perhaps, a T-tool is a staple in all skateboard repair sessions. But for the replacement of bushings, you can also use a wrench to adjust the kingpin nuts.
Changing the Bushings
The good thing about replacing bushings on skateboard is it involves a simple routine of detaching, changing, and tightening. Take note of these steps to achieve the ideal skateboard truck bushing setup.
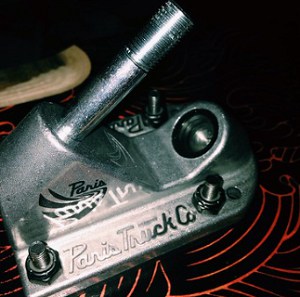
Step 1: Dismantling the skate trucks
Flip your skateboard over with the trucks facing up. Do trucks come with bushings? Note that skateboard trucks have two bushings and washers on each side.
And for easier discussion, we’ll call the bushings and washers closer to the deck the bottom, and the ones more distant will be the top bushings.
Grab your T-tool. Using the hexagon socket, loosen and remove the top-most nut of the kingpin. Put it aside for reinstallation.
Next, detach the top washer, the first old rubber bushing, the hanger, the second old bushing, and the bottom washer. If your washers are also worn-out or no longer in good shape, then you might as well change them.
After removing the parts I mentioned, all you’ll have left mounted against the skateboard deck is the baseplate with the original kingpin.
And besides the bushing washers, check if your pivot cups are still in good condition. If not, you’d also have to remove and change them to complete your truck revamp.
Step 2: Cleaning
This step can be uncommon to some because not all skaters clean their skateboards when replacing bushings. Nonetheless, I still find it essential for the longevity of the board.
So, now that you have the parts you detached, it’s time to clean them. Of course, you also have to put aside all the damaged parts you removed, including the bushings.
For purposes of illustration, let’s have WD-40 as your cleaning agent. Spray an adequate amount of the substance on a neat and dry towel.
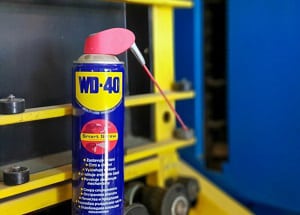
Rub the wet towel on the dismantled parts of the trucks. Make sure to wipe off grime build-up and any stain marks. Check all the corners of the hangers, axle pins, kingpins, and bolt holes.
Step 3: Installing the new bearings
If you have damaged pivot cups, start installing the new ones first. Then, opposite to the detachment process, slide the bottom washer into the kingpin, followed by the bottom bushing.
Next, put the hanger back to the pivot hole and kingpin. Mirroring the arrangement of the bottom bushings and washers, slide the top bushing into the kingpin, followed by the corresponding washer.
- Note: that some washers come in a cupped shape. If you have this type, make sure the opening points towards the hanger.
Step 4: Tightening things up
It’s time to tighten the nuts using your T-tool. Tightening the kingpin’s nut the first time can be challenging because you may not be able to correctly get the nut’s threads in alignment to the kingpin’s.
Nonetheless, a few tries will eventually help you. And in case the nut and kingpin don’t seem to fit, consider having your kingpins replaced.
Do not over-tighten the nuts yet, especially if you use soft bushings. You still have to calibrate them first. Also, you don’t want to damage your newly-installed bushings before using them.
Step 5: Performing a test ride
Break-ins are necessary for skateboarding. Whether it’s your new shoes, bearings, or bushings, you need to spend some time acquainting yourself with them.
So, we need to perform a test ride right after changing the bushings and other parts. Find an open space, or you can take your skateboard to a skate park for better checking.
Use your skateboard like usual. Perform turns, jumps, or any skill you know, and assess if you have achieved the tightness you need on your bushings.
And while it’s a bit impossible to get that tightness level instantly, try to keep a T-tool with you, so you’ll get to perform immediate adjustments until you’re good with the truck’s tightness.
Pro Tips
- How long do skateboard bushings last? We can’t say for certain, but high temperatures will degrade them sooner. You’ll also want to keep bushings from drying out when you hear squeaks from these parts.
- In a bushings skateboard guide, you’ll see two common shapes being mentioned: conical and barrel. The barrel serves as the bottom bushing, and the conical will be at the top.
- This combination is also popular since barrel bushings fit the trucks well, and the conical ones allow for better leans and skateboard turns.
- When dismantling skateboard trucks to change bushings, consider checking on other parts for wear and tear. Doing this will help you apply comprehensive maintenance for all damaged components.
Conclusion
As they say, the skateboard’s liveliness depends on its trucks. And a factor to it is a set of quality bushings. Hence, we always have to be mindful of these parts.
Now that you know how to replace skateboard bushings, you can finally keep your truck’s turning radius on point. Remember the drill on detaching, changing, and tightening to guide you along the process. And from there, your trucks will get the revamp they need.

Hi, I am Charles Harris. I opened this site to write as much as I can about my biggest passion – skateboarding!
I started as a clumsy yet passionate rookie 10 years ago to now a still passionate yet much better skateboarder! But I have to tell you, the whole journey has always been fun and rewarding, indeed not without hardship.