


Has the thought of making a skateboard deck ever crossed your mind? If you’re stoked about anything skate, building a skateboard deck is probably a task you can’t wait to tick off your to-do list.
While buying a ready-made deck is the easiest route to take, nothing beats the excitement of building a skateboard deck according to your unique specifications. Added perks include acquiring new skills and having a customized deck at a fraction of the cost!
Get started by drawing inspiration from this in-depth tutorial on how to make a skateboard deck.
Table of Contents
- What You Need to Make Your Skateboard Deck
- Making a Skateboard Deck in 10 Steps
- Step 1: Prep the veneers for layering
- Step 2: Layer the veneers in order
- Step 3: Glue the veneers together
- Step 4: Press and cure the deck
- Step 5: Cut and shape the deck
- Step 6: Measure and drill truck holes into the deck
- Step 7: Trim excess wood from the deck
- Step 8: Finish the surface of your deck
- Step 9: Gloss with lacquer
- Step 10: Design your deck
- Conclusion
What You Need to Make Your Skateboard Deck

Making a skateboard deck takes a lot of time, effort, craftsmanship, and skill. You will also need the materials and equipment listed here:
- 5 long-grain veneers
- 2 cross-grain veneers
- PVA glue
- Hydraulic Press
- Paint Roller or Glue Spreader with Hopper
- Tracing Paper
- Pencil
- Scissors
- Plank of wood as a template
- Wood Drill
- Wingnuts
- A Band Saw or Jigsaw
- Router Table
- 220 Grit Sandpaper
- 400 Grit Sandpaper
- 800 Grit Sandpaper
- Palm Sander
- Drum Sander
- Protective Gear: construction gloves, goggles, and face mask
- Lacquer Gloss
- Spray Paint, Permanent Markers, Paint Pens, Stencils, Screen Printing Template
These materials are available in hardware and home improvement stores, but consider borrowing equipment from friends or neighbors who might already have them in their workshops to save some cash.
Although making your skateboard deck requires a significant monetary investment, nothing comes close to the fulfillment building your deck from scratch brings!
Making a Skateboard Deck in 10 Steps
Building a deck is no easy feat but you can keep yourself comfortably productive by making sure your workshop is well-lit and ventilated. Keep your safety in check by wearing protective gear too.
Start making the skateboard deck of your dreams by following these 10 steps:
Step 1: Prep the veneers for layering
Lay your veneers flat on a table and segregate them. You need 7 veneers to make a classic 7-ply skateboard deck, 5 long grains, and 2 cross grains. The long-grain veneer is needed to keep the board stiff and strong, and the cross-grain helps hold the concave.
Step 2: Layer the veneers in order
A standard 7-ply skate deck wood grain veneer lay-up goes as follows: long, long, cross, long, cross, long, long. Grab your polyvinyl acetate or PVA wood glue and prepare to stick the veneers together. Tight Bond 2 or 3 would also do the trick; you can even find some small batches of veneer kits online with a quick internet search.
Step 3: Glue the veneers together
Use a paint roller or a glue spreader with a hopper to apply the glue to the veneers. Make sure you get full and equal coverage of the glue on both sides of the veneer except for the top and bottom which should be left clean for the grip tape and graphics. Do not leave any dry spots and puddles.
Work quickly before the glue starts to set and dry which can cause delamination between the veneers. Excessive gluing can lead to warping, twisting, and even splitting as the deck cures.
Step 4: Press and cure the deck
Press the deck with a hydraulic press. Let it stay in the press for no less than 4 hours, but the longer it stays, the better. It would be best to leave it for 24 hours to ensure a solid press and a tight and secure bond. The longer the cure time, the stronger and stiffer your deck will be. Make sure you let the skate deck cure in a room that’s preferably room temperature with minimal humidity.
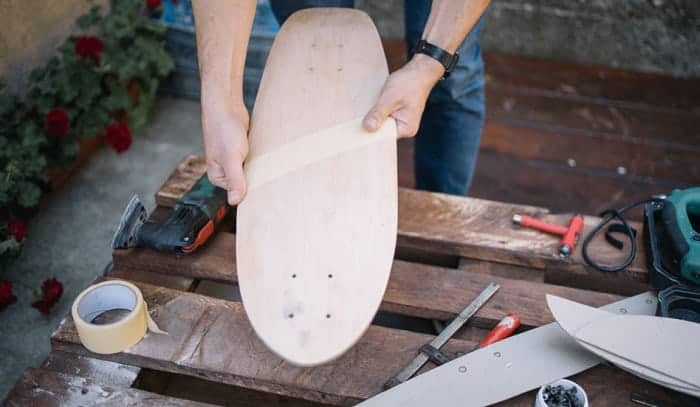
Step 5: Cut and shape the deck
Once you’re done curing your deck, it’s time to cut and shape it. Design a paper half template based on the size and shape you prefer. Do a half template so when you trace it onto the wood, it will be symmetrical. Draw a centerline on a piece of half-inch flat wood and trace the template. Cut out the template using a band saw; you may also use a jigsaw for this. After the cutting is done, sand the pencil line.
Step 6: Measure and drill truck holes into the deck
Measure from the center to the edge of the template and make sure everything is centered. Inspect the deck closely to find out where its nose and tail are. Drill the truck holes into the deck and fasten it to the template.
Step 7: Trim excess wood from the deck
Once your deck is fastened to the router template, trim the excess wood to around ⅛ of an inch to the template so that the router doesn’t have to work so hard when shaping. Hand route the deck with a round-over bit to take down the additional material. This is necessary so that you don’t have to sand too much. If you don’t have a hand router, some rough grit sandpaper on a palm sander can be used to get that nice round edge.
Step 8: Finish the surface of your deck
Once you’ve cleaned up the edge on a drum sander, it’s time to finish the surface of the deck. Use a 220 grit attached to the palm sander for a nice and smooth finish. After that’s done, go around the entire deck with some 400 grit sandpaper by hand to clean things up, then check and feel your deck by hand. This is the final sanding step.
Step 9: Gloss with lacquer
When you’re done sanding, gloss your deck with multiple coats of lacquer. It’s good to lightly sand the deck between coats with 400 to 800 grit sandpaper using a few light swipes. It not only smoothens the finish but will also give a great sheen.
Step 10: Design your deck
Once your deck is glossed, it’s time to get creative! You can use spray paint, permanent markers, paint pens, stencils, or even try your hand at screen printing. Ensure to check where the nose and tail are before applying the design or graphics you want. Hit your deck with another light coat of gloss to seal your work of art. Once dry, your deck is ready to grip and rip!
Conclusion
Building a skateboard deck is exciting, rewarding, and nothing short of fun! It gives you the liberty to customize and design to your liking. We hope this guide about how to make a skateboard deck gives you a sense of accomplishment and a stronger affinity for skateboarding.
While making a skateboard deck involves exerting effort, unlocking new skills along the way makes it well worth it. If you enjoyed building your deck, don’t forget to share this post with other skateboarding enthusiasts you know.
Tell us what you think about this tutorial by leaving us a comment, we’d love to hear your insights!

I am Michael, and I have been enjoying this fun sport for seven years. And nothing is better than having a community to share our passion for those thrilling tricks. I am ready to tell you all I know about skateboarding, showing you how to choose a good board and trick to start and how the practice goes. Stay tuned!