

Sometimes, outdoor flips and ollies seem too plain for professional skateboarders. And for someone who always plans to try something new, the roads aren’t always good for novel tricks or ride styles.
That means the only way to make skateboarding more fun and challenging is by getting into a skate park. However, not everyone has convenient access to these places, and a skate park can be crowded and lack free space.
Don’t worry if you’re one of them because problems like these only require simple solutions. Let me teach you how to make a skateboard ramp (quarter pipe system)
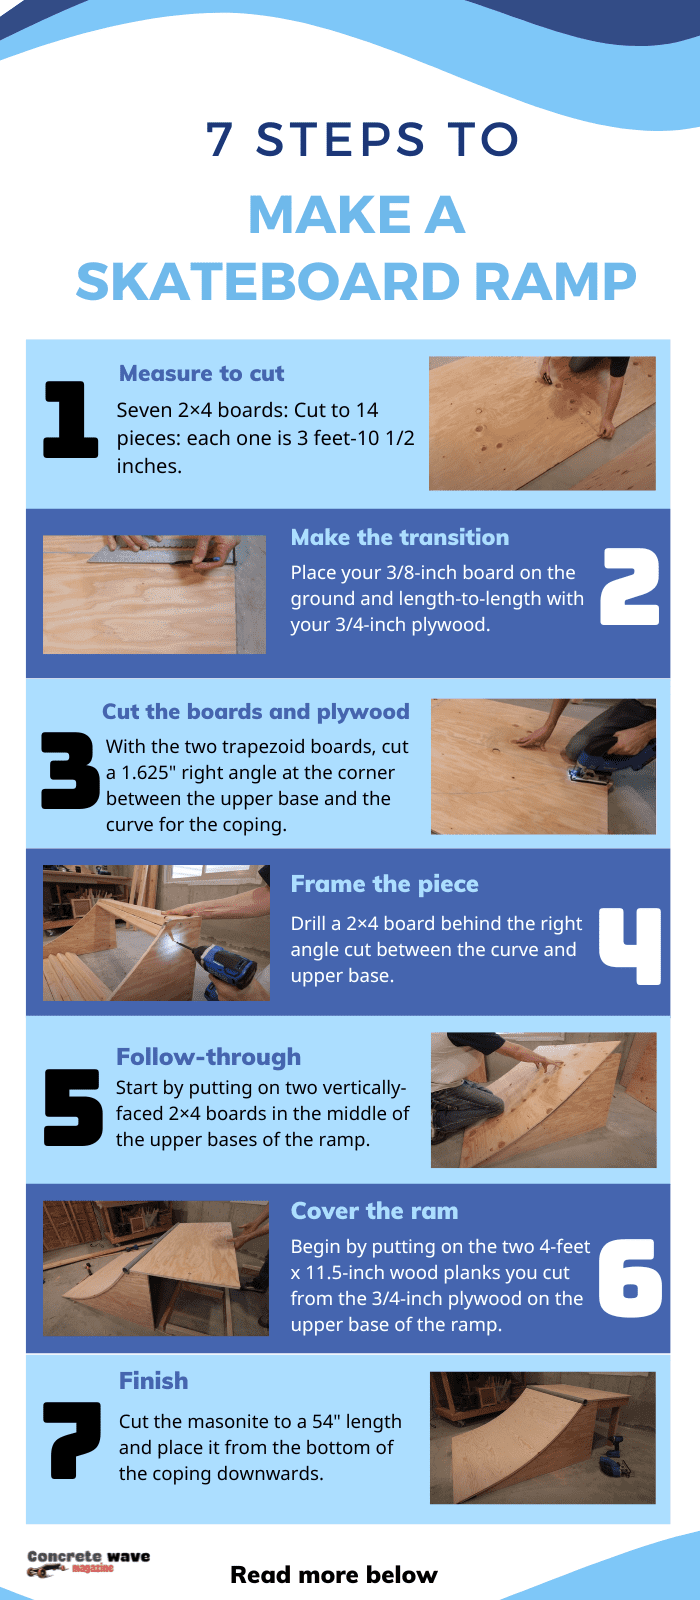
Table of Contents
What You Will Need
Making an entire skateboard ramp is like crafting a school project. But this time, let’s be more serious about its materials. In this tutorial, we’ll make a must-have skateboarding obstacle, which is the quarter pipes. Here are the things you need.
Building materials
Most of the components you need for your DIY skateboard ramp fall under the Building Materials category in a home improvement store. That means you won’t have a hard time searching for your ramp’s parts as you can get a majority of them in one stop.
On the other hand, if the steel coping is unavailable, you can check a steelwork store.
Let’s begin with the woodwork. Prepare:
- Plywood sheet: two pieces of 4×8 feet, 3/8 inches, and one piece of 4×8 feet, 3/4 inches
- Masonite sheet: one piece of 4×8 feet, 1/4 inches
- Boards: seven pieces 2×4, 8 feet long each
For the steel components of the ramp, you will only need one 2 feet 3/8 inches x 4 feet steel pipe for the coping and one 1 foot 6 inches × 4 feet, 3/16 inches metal or steel piece.
Lastly, to attach these parts, prepare a 1lb box of 1-5/8- inch screws and another 1lb box of 2-1/2-inch screws.
Working tools
To build a skate ramp, you also need the right equipment to make the best of every component.
- Steel tape or measuring tape –This tool will help you calculate the exact dimensions of each component, especially before cutting them. A measuring tape will also help you foresee the size of your skateboard ramp.
- Markers and pencils – Markers are always a relevant factor where measurements exist. Use a pencil to make a sign or a mark on the plywood or any of your skateboard ramp materials. This tool will help you find the correct locations once you begin mounting the parts.
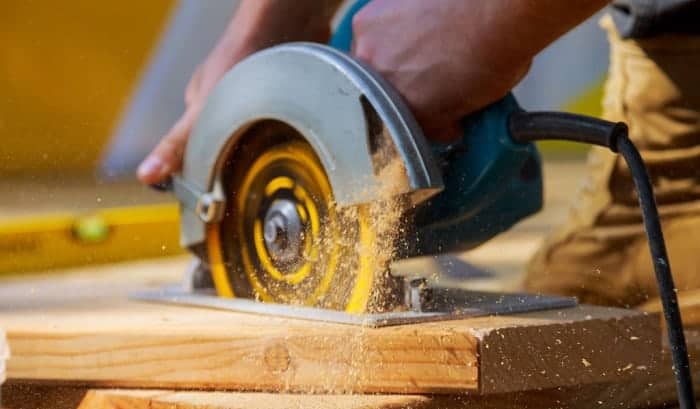
- Circular saw – You need to have a circular saw before you make transition cuts on the wood. The arched portions of your ramp have to be measured equally and accurately, which is why you will need this tool.
- Plain saw – And for other woodworks that require straight cuts, a plain saw will be enough.
- Drill and Drill bits – The last piece of equipment you need is a hand drill and several drill bits to attach your ramp’s parts. Using these tools will not only add precision but will also make your work look clean and of good quality.
Installation space
From your outdoor view, the moment you step into your house’s yard, try to visualize where you would want to place your homemade skateboard ramp. You will have to prepare enough provisions not only for the fixture itself but also for additional space.
Don’t put your ramp near your gardening tools or any sharp object to protect you from injuries once you fall off your skateboard.
A pro tip: it’s good to find a spacious corner in your yard. You can lean two sides of your ramp on perpendicular walls or fences. That way, your ramp placement looks cleaner, and there’ll be a wall that could protect you from falling off your board. Another tip is to create ramps rails should there be no wall to lean your quarter pipe ramp.
Important notes:
Before going into these steps, you can check out the process of building a skateboard ramp in a small size for traveling. It might help you better understand the measuring, cutting, framing, and drilling boards later.
Steps to Building Skateboard Ramp
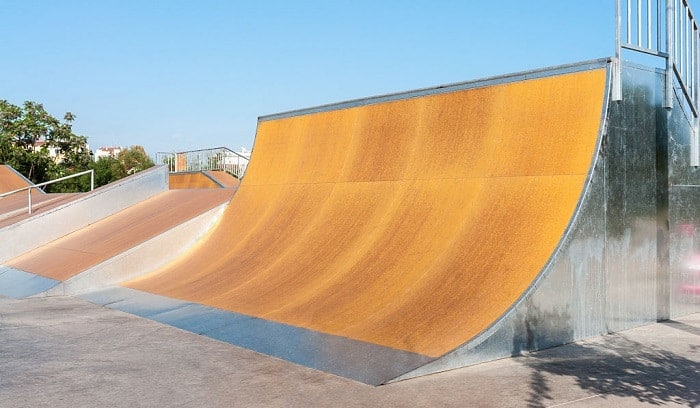
A skate ramp is like a wooden box but only with one side curved inwards, sloping down, and outwards. Here’s a more detailed explanation of how to make skate ramps.
Step 1: Measure to cut
Seven 2×4 boards: Cut to 14 pieces: each one is 3 feet-10 1/2 inches.
Plywoods:
- Grab your 4×8, 3/4-inch plywood.
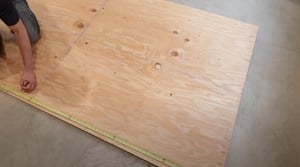
- Draw a line dividing the board into two parts lengthwise, with one at an 11.5-inch width.
- Divide this portion into two 4-feet planks of wood with your pencil.
Next, draw a diagonal line at the 36.5-inch partition of the board. This line should divide the board into two equal right-angled trapezoids with upper and lower horizontal bases of 22-inch and 74-inch, respectively.
You need not make measurements for the coping and steel piece since they’re in an appropriate size already.
Step 2: Make the transition
Place your 3/8-inch board on the ground and length-to-length with your 3/4-inch plywood. Partially, pin one of your 8 feet 2×4 boards on the width side of the 3/8″-inch plywood using a screw.
The screw should be 2′ from the corner of the plywood and 6′ from the tip of the 2×4 board. Also, make sure the ground is flat enough to make accurate measurements.
Put a pencil on the longer end of the 2×4 that touches the 3/4-inch plywood. Rotate the 2×4 like a clock’s hand as you leave a concave line that almost goes with the diagonal line on the 3/4-inch board.
Note that it’s the 11.5-inch portion of the 3/4-inch board adjacent to the 3/8-inch plywood when plotting the two boards down.
Step 3: Cut the boards and plywood
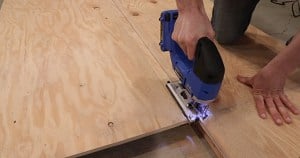
Before doing this step, always remember to protect yourself from cuts and injuries. Begin to cut on the lines you made on your wood components. Be sure to use sharp saws to leave smooth edges.
With the two trapezoid boards, cut a 1.625″ right angle at the corner between the upper base and the curve for the coping.
Lastly, snap the lower endpoint of the arch, and leave enough height from the bottom side of the board to cover the tip of the 2×4 board.
For easier understanding, let’s visualize the boards in trapezoid shape still after the arch cut.
Step 4: Frame the piece
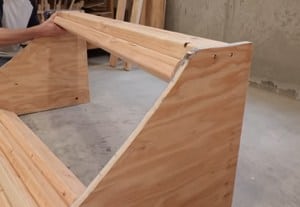
Prepare all your screws. Begin by mirroring your trapezoid boards at a distance equal to the length of your 2×4 boards.
Have someone support you as you drill the ends of your 2×4 on the lower tip of your boards’ curves. The broad surfaces should face down and up.
Next, put another 2×4 on the bottom and upper right-angled corners of the plywood. This time, the narrow side faces vertically.
With your screws, drill a 2×4 board behind the right angle cut between the curve and upper base.
Step 5: Follow-through
It’s time to strengthen the skating areas by adding more frame support. Start by putting on two vertically-faced 2×4 boards in the middle of the upper bases of the ramp. These pieces of wood should be adjacent to each other.
Next, put one 2×4 on the upper tip of the curve with the broader sides facing in and out. Lastly, install the rest of the 2×4 boards equally gapped on the curves of the ramp with the narrow sides facing out.
Always remember that no part of the 2×4 frame overlaps the shape of your trapezoid woods.
Step 6: Cover the ram
Begin by putting on the two 4-feet x 11.5-inch wood planks you cut from the 3/4-inch plywood on the upper base of the ramp. Attach these parts on four 2×4 boards you initially installed.
Drill the coping on the 1.625-inch space you cut between the upper base and tip of the transition. Be sure the screws’ heads do not overlap the coping surface.
Next, lay the 3/8-inch plywood over the transition of the quarter pipe ramp from the bottom of the coping downwards.
Repeat the process with another 3/8-inch board. Be sure to cut these boards to lengths of 66-inch and 69-inch to leave enough space for the steel piece.
Step 7: Finish
One of the last layers on the transition you need to put in the masonite sheet.
Cut the masonite to a 54″ length and place it from the bottom of the coping downwards. Connect the 1 foot 6 inches × 4 feet, 3/16-inch metal piece down to the ground from the lower end of the masonite board.
Be sure that all the screws do not bulge on any part of the ramp, especially in areas where your skateboard rolls over.
Conclusion
To be a skateboarder is one significant achievement for you. And making a quality DIY ramp is another milestone in your skateboarding journey. Sometimes, you need not head to a skate park to enjoy your boards.
Now that you know how to make a skateboard ramp, you’ll no longer have to feel bad about not getting into skateboarding arenas. Remember the concepts I have shared with you, and it’s not far that you can create more challenging skateboarding obstacles at home, like a mini ramp, halfpipe, or launch ramp.
Did you enjoy this tutorial? Leave your thoughts in the comments section.

I am Michael, and I have been enjoying this fun sport for seven years. And nothing is better than having a community to share our passion for those thrilling tricks. I am ready to tell you all I know about skateboarding, showing you how to choose a good board and trick to start and how the practice goes. Stay tuned!